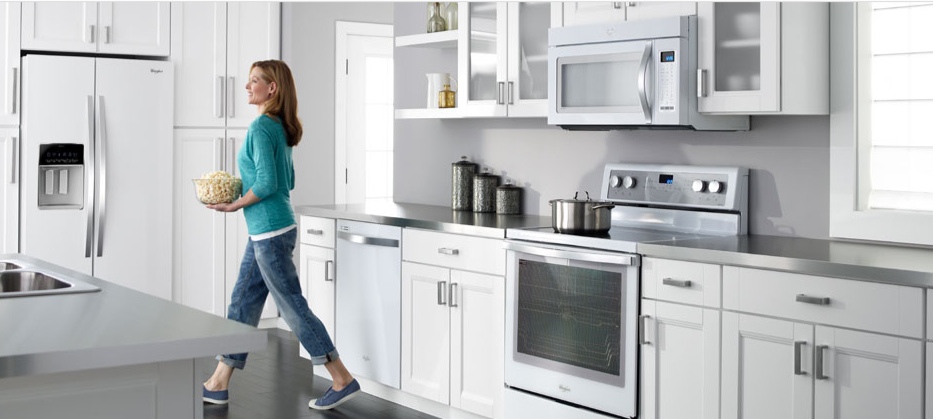
@home On Cape Cod Newsletter. November 2012
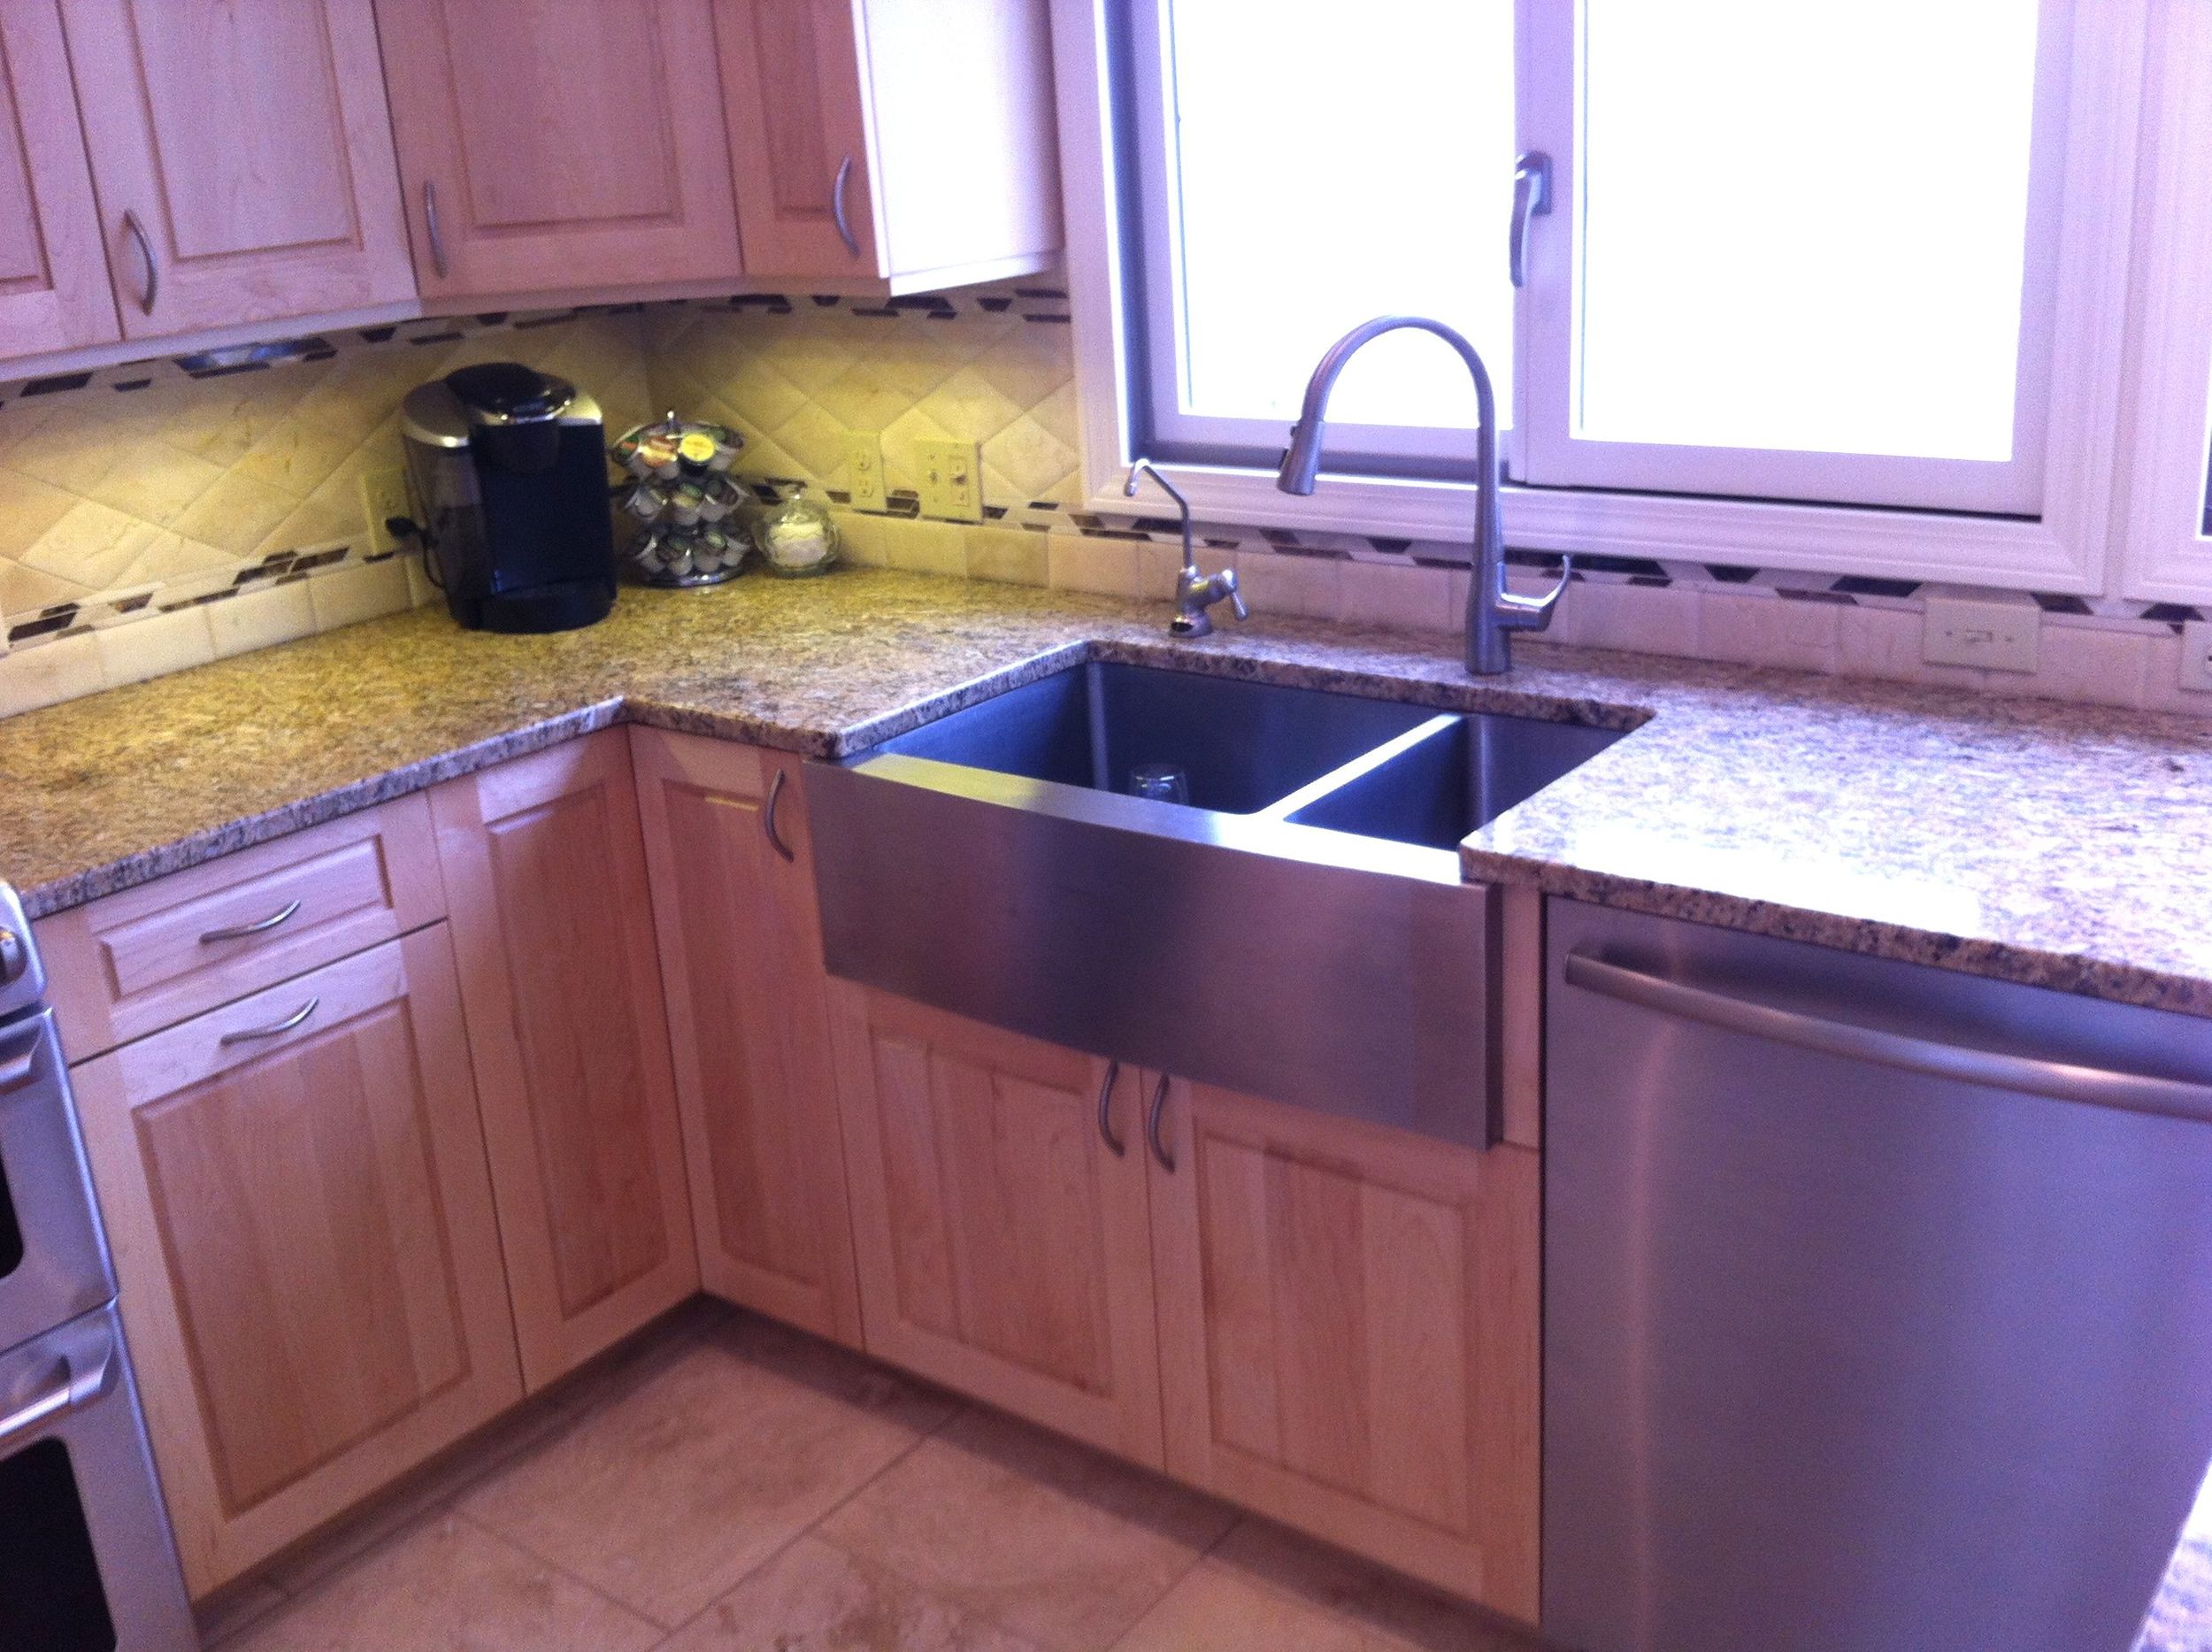
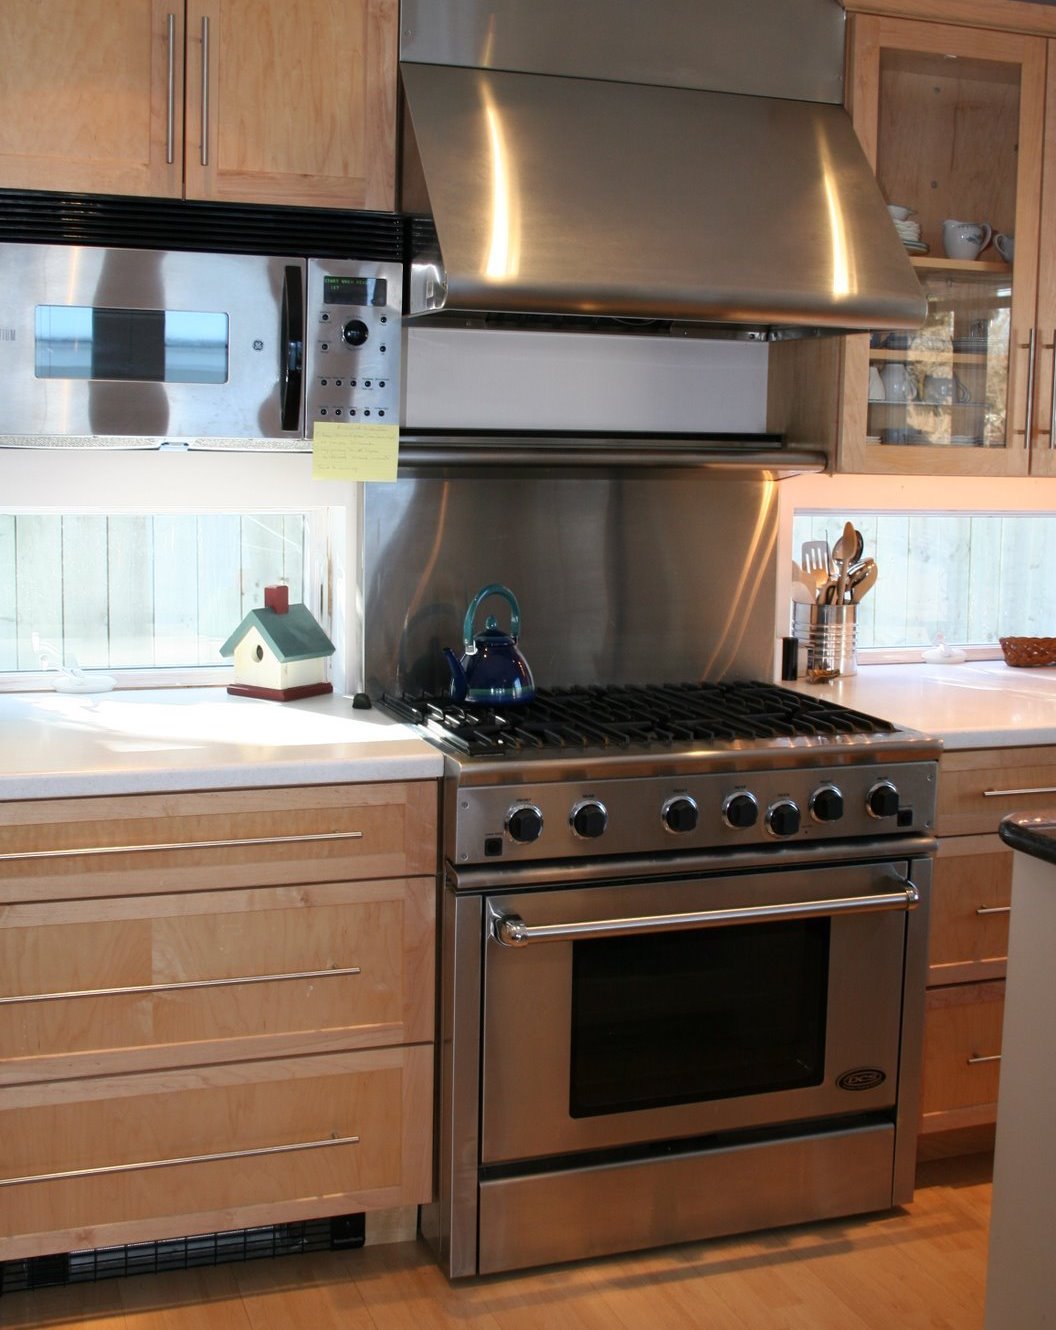
@designREMODEL Newsletter My heartfelt THANKS! to you for helping us have another great year! And this thanks goes out to all of our clients, trade partners, suppliers and friends because each and everyone of you have contributed to our success in big and small ways.

Happy Thanksgiving!

Willy Wonka. A Family Affair...

Willy-Wonka-Poster-Art-201x300Do It At Cotuit! has become the catch-phrase for this powerhouse of live theater and a wide variety of arts and media. Located right on Route 28 in Cotuit, they have an ever changing art gallery, multiple venues for live shows, and educational classes & workshops are also on going. So there is always something happening. And speaking of shows, this year's holiday production features the zany fun of Willy Wonka with a good number of families participating as cast and crew.

This year, my daughter KatieBeth performs in "Willy Wonka" as an Oompah Loompah. This is her second holiday production at Cotuit. Her first was performing as Zuzu in It's A Wonderful Life. In addition, my better half Tara, takes yet another turn as the production coordinator for the entire show. A position she has volunteered for many times.

I will serve a supporting role as one of the stage hands working back stage. For our family, Willy Wonka will provide much fun together at the holidays!

If you want to enjoy Willy Wonka, don't delay ordering tickets. As many shows are of big city caliber and tickets sell out fast! There will be 12 shows spanning Dec 7-23rd. Tickets can ordered online at the web link below.

If You Go:

Cotuit Center for the Arts 4404 Falmouth Road (Route 28) Cotuit. 508.428.0669

ArtsOnTheCape.org

Getting Ready For Winter

With Winter around the corner, here are some reminders to prepare you for the cold, snowy months ahead.

1. Locate and place in an accessible location.

Ice Scrapers Snow Shovels Ice Melt Jumper Cables

2. Shut off any exterior water supplies and disconnect any hoses hooked up to frost free spigots.

3. If you have a fire hydrant near your property, mark its location with a tall stake and be sure to clear it out after any snow storms for access in case of a fire.

4. Clean out your gutters...again! Ice build up over clogged gutters can lead to leaks.

5. Protect any prized shrubs exposed to winter winds with a stake and burlap surround.

Our Next Issue

In our next issue of @home, I will share Cape Cod Winter Living... How To Survive!

@home Tip

Nest Thermostat in Cape Cod RemodelingAre You Ready For a Nest?

Recently, I left a job-site early on a chilly fall afternoon. I picked up my iPhone and with a few taps, turned up the heat so the house was toasty warm upon arriving home. Then later that night, I felt a bit too warm so I turned the heat down using the my iPhone that was on my night stand.

For some this might seem like old hat. But for others, this is something right out of Star Trek. From one of the designers of the iPod, we can now have much improved control over how we heat or cool our homes thanks to a well-designed piece of technology called NEST.

NEST is a digital, self-learning thermostat that can be controlled by any device that has online access such as a smartphone, computer or tablet. The beauty lies not only in its good looks, but also in its ease of use and simplicity.

Once installed, you use it as you normally would any thermostat adjusting it to suit your comfort. After about ten days, the NEST will start setting itself based upon your usage pattens. It will also go in to an away mode if it senses that no has occupied the space for a certain length of time.

In a nutshell, NEST is a worthy technology for your home because:

1. NEST looks fabulous on any wall. No clunkiness here.

2. No complicated use or programming instructions.

3. Turn it up, turn it down. Done.

4. Nice big numbers that are easy to read.

5. Cool Tech to show off to your friends!

For more details on NEST, read the Slate.com review.

Go to the NEST website.

For clients of @designREMODEL, I'll be happy to help you decide if NEST is right for your home. Just give me a call or shoot me an email.

Stainless Is Over

Stainless Steel Appliances in Cape Cod Home RemodelingMove over stainless steel. Your time in the kitchen is done. Whirlpool  recently rolled out at the 2012 Kitchen and Bath show it's brand new Ice Collection of appliances which is a fresh take on classic white. This updated version has a glossy sheen that is almost glass like in appearance. In addition, Whirlpool is also releasing a Black Ice Collection. So if you are getting ready to remodel your kitchen here on Cape Cod, should you dump the stainless look and go for the new look of the Ice Collection?  Consider that not surprisingly in Europe, opaque glass-fronted appliances with an elegant whitish or black hue are trending high on most remodeling to-do lists. When it comes to choosing stainless or the new Ice, it will depend upon personal tastes as well as what your choice are in cabinets and counter tops.  If I was doing an all white kitchen, I would go for the White Ice, not so much however if my cabinet choice was maple or similar light color.  Stainless can be a great neutral color that goes well with many colors.

Personally, I think stainless will always have it's fans, certainly amongst those that prefer the look of a professional kitchen. However, I do think that new choices such as Whirlpool's Ice Collection will quickly gain a following.  For me, I like the idea of having appliances that blend into a kitchen, show no fingerprints and are less vulnerable to  scratches. I'm also keen on the smooth and crisp edges of the white ice.

Over the next year, I believe that you will see other manufactures rolling out their own versions of the Ice Collection.

Click the link if you want to learn more about the Whirlpool Ice Collection

@home On Cape Cod Newsletter - September 2012

The first delicious tingles of fall are here. Love those cool mornings and warm days! In this issue, We're about cooking pizza, peels and a local gem for those who love working in the kitchen. And I'll share a cool website for serial remodelers to visit and wrap it up with a question for you: Do you have money holes in your home?

This newsletter allows me to share about living life on Cape Cod and also keep in touch with our many fabulous clients. Please enjoy!

John

@designREMODEL

An A-Peel-ing Place to Visit on Cape Cod

With busy lives, pizza is often a great quick meal that everyone enjoys. And lately, we've taken to making our own as finding good ones, either take-out or store bought have been less then satisfactory. And making a delicious pizza is really simple as I start with a pre-made crust from BOBOLI and top it with some marinara  sauce. On top goes either turkey sausage or pepperoni. And we round it out with a nice layer of mozzarella cheese. For fun, I've experimented with different items from the pantry such as diced tomatoes or assorted spices. Tomatoes were good...Spices well, I need to work with pinches rather then spoonfuls...

Ten minutes in the oven and the pizza is done. Especially when using the pizza stone that my wife Tara bought home one day. So all was good in making pizza.  But sometimes getting a loaded pizza out of the oven was a challenge. Tara suggested that we get a peel. "A peel?" I asked my lovely wife,  "Is that a long handle thingamajig used in pizza parlors?"  "Yes, and I know exactly where we can get one." she responded with a hint of delight at a possible shopping expedition.

The following Saturday found us heading into Hyannis on a mission to acquire a peel to round out our collection of pizza making tools. (We had already upgraded from the small wobbly pizza cutter of my bachelor days to a stainless steel, ribbon slicing, take no prisoners  and cut in one pass pizza cutter.) As per the missus's directions, we drove around on one way streets until we ended up on Main Street Hyannis. Opposite the train station, where we had boarded the dinner train one year for a memorable and delicious Thanksgiving dinner.

We parked right in front of our destination, which had a glass store front and style of building that recalled a earlier, slower time.  Hanging in the front, was the sign that said All Cape Cooks Supply. I thought..This should be fun... Not.  Going in the front door, we were greeted with a tsunami of cooking paraphernalia.  There was stuff everywhere!  Bowls, ladles, glassware, very large cooking pots for very serious cooks. Appliances and gadgets. Lots of grilling tools. Tools to slice and tools to dice. And our purpose for visiting. The Pizza Peel.

All Cape Cooks Supply. Main Street. Hyannis.
Tin Ceiling With Peeling Paint Adds Charm

We found a nice selection of Pizza peels. Short ones. Long ones. Thick and thin. We chose one that was about 24" long with a thin, yet sturdy aluminum blade and a solid wood handle. Mission Accomplished! But then I spied the electric teapots, while Tara dashed off looking for a special fruit colander. So along with our pizza peel, we walked out with a fabulous glass electric teapot from Germany, a new well made colander and a small rack for baking fish on a cookie sheet. (Fish cooks perfect this way. FYI)

What made this store so fun to visit, was the charm of the location and the almost overwhelming selection of anything to do with cooking. That, plus the thrill of discovery of something you had not seen before. Highly recommended to anyone who enjoys cooking!

If You Go.

All Cape Cooks Supply 237 Main St. Hyannis

A Website for Serial Remodelers

Houzz Cape CodThis is an idea that I wish I had come up with. A website for serial remodelers. You know who you are. You look at a house, a room, a corner and think about how you would remodel it, change it, make it better. Well, do I have a website for you! Houzz.com This is the website for those of you who enjoy looking at pictures, reading stories and getting ideas for remodeling and makeovers.

One of the coolest and most useful features is called Ideabooks. This is where once you have set up an account, you can start creating your own Ideabooks of assorted projects for later reference.

Pictures and ideas for baths, kitchens and more abound. 74,000 pictures of bathrooms, 126,000 pictures of kitchens, 61,000 pictures of home exteriors and 36,000 pictures of landscaping! Lots to see and enjoy.

@designREMODEL has set up an online portfolio to start showcasing some of our work in hopes of connecting with new clients. If you have a few minutes, please write a review of the work we did and your experience of working with us. Click this link to write your review. Thanks!

Next Issue

In our next issue, I will share some annual tips on how to get your home ready for the winter season. Plus, you'll hear about an upcoming holiday production at the Cotuit Center for the Arts that will involve my family! A great show to look forward to for the Holidays.

@home Tip

Does Your Home Have Money Holes? Money holes is a term I came up to describe the big gaping holes in your Home's insulation barrier that are costing you money. Here are some examples.

hatchAttic Access. Do you have pulldown stairs? Chances are they are un-insulated and allowing air and heat to flow out of your home through the attic.  A simple cover like the one pictured to the right, properly installed will go along way to blocking heat loss.

If you have a hatch entry cover that you lift up and out of the way to gain access to your attic, you are losing heat if it's not insulated. Adding 2-3 layers of rigid foam to the backside of the hatch cover, will go a long way towards reducing heat loss. It's also important to use weatherstripping to block air movement.

Fireplaces Many times fireplaces are overlooked as source of heat and energy loss.  Make sure the damper is closed when not in use. Also consider installing glass doors to create a secondary air barrier.  And if you rarely use the fireplace, place some fiberglass insulation inside a large garbage bag and tuck it up inside the chimney.  (Leave a tag on the damper handle to remind you that you have insulation inside the chimney flue.)

Basement Doors Many homes on Cape Cod have exterior basement access though bulkheads.  The thin steel found in the doors of these bulkheads is the only barrier between the basement and the elements.  Time and again, when we have installed an insulated door at the bottom of the bulkhead steps, clients have told us what a tremendous difference the new door has made in keeping their basement warm!

@home On Cape Cod Newsletter - August 2012

Dogs on the Job

I am a life-long dog lover, so it's always a pleasure to meet different dogs when we're working on our client's homes and meeting the many different dog personalities.

The first one that comes to mind was Baxter of Marston's Mills, a lovable and beautiful Golden Retriever that greeted me everyday with his tail wagging madly while leaning in against my legs. His owner Wendy, said that Baxter was so friendly, that if a burglar broke in, Baxter would greeting them with lots of body leaning and a paw out for a shake!

In Falmouth, my dog Blackie enjoyed hanging out with Woody, who is full of boundless energy and is a good soul like so many of my client's dogs. I got a big kick out of watching Woody drag his small dog bed into whichever room he was hanging out and tucking himself in. This is a big dog fitting into a small round bed!

Sabai

Sabai Recently, we we're greeted over in North Falmouth by Sabai an Australian Labradoodle. Wow! what a ball of fun with a warm personality and just a great looking dog!

Recently, we we're greeted over in North Falmouth by Sabai an Australian Labradoodle. Wow! what a ball of fun with a warm personality and just a great looking dog!

Blackie

And this is Blackie, our family dog and my constant presence on just about every project when it's not too hot. He's a gentle soul who is happy to hang out in the truck knowing that people are nearby. He came to us by way of a dog rescue back in 2000 and driving home with us, he sat (all 93 pounds) in my lap head hanging out the window loving it all! Whenever he hops out of the truck on the job, he invariably finds his way under the table saw and ends up covered in saw dust!

We introduced him to the Ocean and he lives to visit the beach! With the warm weather, he hangs at home with Emerald the cat, a new addition that Blackie accepted whole-heartedly and we often find them snoozing near each other!

I've found that with all my clients, their dogs reflect who they are. Good Souls! and Good folks to work for...

Around the Cape

Heritage Museums and Gardens

During our most recent vacation this past July, we took a trip to Heritage Museums and Gardens, located in Sandwich. This is a hidden gem. What was there not to like? We enjoyed visting Hidden Hollow with our daughter Katiebeth. We appreciated the efforts and craftsmanship of the carpenters from the Upper Cape Cod Technical school, that went into building the gigantic treehouse that over looks the children's play area. Quite a fun project!

19

We also enjoyed learning about and viewing the work of Norman Rockwell. For those that are not familiar with how he created his work, you will be in for a surprise as I was. Seeing this exhibit with some of his actual works and the stories behind them, was well worth the reasonable cost of admission. Highly recommended!

The gardens in bloom have a very cool water feature that I would love to replicate in my own garden The gardens must be truly spectacular when the rhododendrons are in bloom as they are everywhere across the grounds.

A real delight to round out our trip, was the round house that contained lots of vintage cars that were just a feast for the eyes. Definitely a worthy stop for car buffs. Did I also mention the merry-go-round that is much beloved by kids and adults?

If You Go: Heritage Museums & Gardens

Wellfleet Oyster Festival

This is an event we're hoping to make this year as we love going "down cape" especially in the off season. Be warned, as this is a very popular event so you will need to make a day of it. Event Dates are October 13th and 14th 2012

If You Go: Wellfleet Oyster Fest

@home Tip

Is your home properly protected from power surges? With Summer's onset, frequent lightning storms across Cape Cod put your TV's, computers and cellphones (when plugged in for charging) at risk.

17

An article at ThisOldHouse.com states that many homeowners mistakenly believe that they are protected when they plug a device into a power strip. To fully protect your electronics and the like, you should have 2 layers of protection: 1. Have an electrician install a whole house surge suppressor at your electrical panel and 2. Plug any and all electronics into a properly labeled surge suppressor.

In fact next to my desk, I have my computers and cellphones plugged into a power strip labeled Surgemaster II with phone line protection. I also have my washer and dryer plugged into a surge suppressor as they contain electronics vulnerable to power surges. And at my electrical service panel, I have a whole house surge protector installed like the one pictured to the right.

If you would like to have a whole house surge suppressor installed, feel free, to call our Electrician Richard Cook at 774.238.0899 to schedule a service visit. You can also find out more about protecting your home with a surge suppressor at the This Old House website.

We'll Make Short Work of your Honey-Do List When We Remodel Your Bath Or Kitchen!

Details

Purchase a complete bath or kitchen remodel and we'll provide at no extra charge, up to 8 hours of additional services on your home*.  Valued up to $750.00

  • Need a fan installed by a professional electrician?
  • Need a door lock changed?
  • Need a faucet replaced by a professional plumber?
  • Need a fort built for your children?

Done! Along with a new bath or kitchen too!

Next Step

Explore this website for ideas, pictures and reviews from clients then give us a call at 508.477.9003 or clickhere to reach us via email.

*Labor only, restrictions do apply. Please ask for details. Promotion expires August 15th 2012

Bathroom Layouts That Work - By Scott Gibson

gi025-00_ldA bathroom remodel can range from something as simple as upgrading a vanity or replacing a toilet to a complete overhaul, which includes the relocation of plumbing and electrical lines or even enlarging the room. Layout is a key consideration, not only because it has a major impact on what the remodeled space will be like, but also because it affects the overall scope and cost of the project. Creating a large bathroom opens the door to a number of design options, including the addition of a large soaking tub or walk-in shower that wouldn't be possible in a smaller space. It's one argument in favor of expanding an existing bathroom into an adjacent bedroom or closet.Creating a large bathroom opens the door to a number of design options, including the addition of a large soaking tub or walk-in shower that wouldn't be possible in a smaller space. It's one argument in favor of expanding an existing bathroom into an adjacent bedroom or closet.

There’s no better place to start than with the bathroom you already have. Its shortcomings as well as the features you’d like to preserve can be a guide to what you want in a new bathroom. You might be lacking storage for linens, feel cramped when there’s more than one person at the sink, or find there’s not enough room around the tub to towel off comfortably after a bath. On the other hand you might want to keep the vanity sink for storage or the tub/shower unit because you have three young kids. Whether you work with a design professional or devise your own room layout, a detailed scale drawing will help you spot problems and envision design solutions.

The second step is to make a list of your priorities. Each major fixture comes with its own set of requirements—for plumbing and wiring as well as how much floor space it should have. What’s at the top of your list? A whirlpool tub big enough for two? An oversize walk-in shower? A separate enclosure for the toilet or an enlarged vanity with two sinks? You may not be able to get everything, so rank your wish list to help make final decisions easier.

Planning on Paper

Drawing a new bathroom on an existing floor plan can help you visualize new possibilities. This existing 6-ft. by 9-ft. bathroom is in a mid-1970s Cape Cod. It includes a fiberglass tub/shower unit, a single-sink vanity, and a toilet. By moving one interior wall about a foot and shifting fixtures around, a much more pleasing bathroom is possible, as evidenced in the after floor plan.

The window and toilet locations stay the same to help minimize construction costs and allow other amenities: an oversized shower that takes the place of the tub unit, a double-sink vanity, body sprays in the shower, new lighting, and a radiant floor heating mat.

What does the plan give up? Not much. A small hall closet was eliminated and some plumbing changes were made, but they were relatively minor and not nearly as expensive as moving the toilet would have been.

Bathroom-Layouts-gi023-01_med               Bathroom-Layouts-gi023-02_med


Important Considerations

gi024-01_medThe position of the fixtures was well planned in this remodeled second story. Painting the walls and ceiling the same color takes the focus off the shape of the roofline.The position of the fixtures was well planned in this remodeled second story. Painting the walls and ceiling the same color takes the focus off the shape of the roofline. Photo by: Alan Geller Bathrooms are probably the most complex rooms in the house. They have a network of plumbing and electrical lines, so typically the more extensive the changes in layout, the higher the project’s cost will be. It may not seem like a big deal to move a toilet a couple of feet one way or the other, but relocating waste and vent lines is difficult and time consuming. Depending on how your house was originally built and where the bathroom is located, it may not be practical at all. Moving sink and shower drains is less daunting, but the job can still be difficult. The bottom line: If spending is a major concern, you’re better off working with an existing plumbing and wiring layout.

Another consideration is whether you’re willing to move a wall to gain more room. If there’s an adjacent closet or bedroom that doesn’t get much use, borrowing a few feet by relocating a non-bearing wall may mean a big payoff. In a house with a cramped second floor it may be possible to create a larger bathroom by adding a dormer.

Finally, you’ll have to consider whether to gut the room or simply patch the walls, floors, and ceiling. In general, you’re almost always better off tearing out and starting new. It will give your builder a chance to correct hidden problems and often makes the job go faster.

Creating a Layout

gi028-01_medThis small bathroom is simple in style and decoration but the artful light fixtures and medicine chest bring the eye to the ceiling, visually enlarging the space.This small bathroom is simple in style and decoration but the artful light fixtures and medicine chest bring the eye to the ceiling, visually enlarging the space.

Bathrooms don’t have to be any particular size or shape to be successful. Part of the layout will hinge on how much room you have to work with, and part will depend on the plumbing fixtures and other room features you’ve identified as “must haves.” For example, if a large whirlpool tub is at the top of your priority list, the rest of the layout should be planned around this major fixture.

A key part of design is the relationship of various room features to each other: the distance from a toilet to an adjacent wall, for example, or the clearance between a toilet and tub. These planning guidelines can be expressed as either minimums that meet the local building code or as design recommendations, which are usually a bit more generous. Both numbers are important for planning. A bathroom designed for someone with physical limitations has its own set of guidelines.

Basics of Good Design

Every family’s needs and every house are a little different, so rather than simply copying a floor plan you’ve seen elsewhere and hoping it will work in your house, make use of design fundamentals to help you develop a floor plan that works for you.

These elements were developed by architect David Edrington, who credits A Pattern Language by Christopher Alexander for many of the original ideas. • Avoid layouts with more than one access door.

Create an entrance alcove for a bathroom off a hallway to provide an added measure of privacy.

A well-shaped bathroom is in the shape of a square or a rectangle whose length is not more than twice its width.

Good bathrooms have a clear central area where you can wash or dry off, with fixtures like the tub and toilet located in alcoves around the edges of the room.

Natural light is important. If the room can have only one window, locate it so it illuminates what you see when you first enter the room.

Use the “intimacy gradient” in designing a floor plan by locating the most private parts of the bathroom farthest from the door.

Bathroom-Layouts-gi029-01_med Bathroom-Layouts-gi029-02_med

Scott Gibson is a freelance writer and contributing editor to Fine Homebuilding magazine. He lives in Maine. Drawings by: Christine Erikson 

Decked Out With Azek Decking On Cape Cod!

New Deck and Hot Tub Platform

We've recently wrapped up a deck make-over for a new client in Falmouth that was referred to us by another client. While not our typical project, we've actually built many decks over the years, so it was a good fit for us.

In addition to rebuilding the deck, we had to build a concrete base for a hot tub and relocate/rebuild the stairs.

A Horror Show In Progress

When I first saw the deck and railings, I could not believe my eyes, for the deck had been painted white and grey when the house was built in 2006 and it looked like it had a bad case of the flakes, Paint was peeling and shedding off the decking, off the railings and even off the painted underside.  The ground around the deck was covered in a carpet of paint flakes and chips.

Throwing Away Thousands of Dollars Worth of  Labor and Materials

Regrettably we had to tear apart the upscale railings and throw them away along with the decking because it was not practical to try and save them. I winced thinking about how much work it had taken to build the railings and then 6 years later...poof! tear it all off and throw it way!

All of the existing decking and railings were constructed with pressure treated lumber and then painted over with a solid latex paint. Even the nail holes in the decking were filled and painted. Unfortunately, the decking and railings were never allowed to dry out. All the moisture and chemicals that were still in the wood was trapped by the skin of the latex paint. In fact, when we took the railings apart, we found that the wrapped posts, were saturated with water and thousands of ants had taken up residence because they were attracted by the trapped moisture.

In addition, we found that the framing had not been sufficiently secured and there was potential for major damage in the event of extreme winds such as a hurricane.

Before reconstructing the deck, we poured a 12" reinforced slab on compacted stone to hold the hot tub. Over this slab, we installed pressure treated sleepers and then topped the sleepers with composite decking.

The Reconstruction

Once we added additional framing and hardware to completely secure the deck, we then proceeded to install new composite Azek decking. I LOVE AZEK!  This stuff is easy to work with, cuts and drills like wood and installs smoothly use the the color matched stainless screws.  Azek is consistent in width and thickness and has none of the downside of wood. It even comes in 20' lengths, thus reducing the number of butt joints.  The downside to Azek is that it is pricy and flops around like semi cooked spaghetti during installation.   However it's worth the cost, as its a once-in-your-life-time premium product.

The railings were reconstructed using a railing system called Radiance Rail. This system has composite sleeves that slip down over a 4x4 post and then top & bottom rail with square ballasters is assembled and installed. To finish the railing off, a top rail is dropped into place and the posts are capped with a cover.

We relocated and reconstructed the stairs so they would land on the deck we had built previously for the hot tub. These stairs are more comfortable then the old ones, as they were built with shorter more consistent riser heights. Going up and down these stairs feels natural and comfortable.

Delighted Clients

Our clients were delighted with the end results. They now have a low maintenance deck that was completed just in time for a week long large gathering of family members!

Below are some iPhone pictures of the completed deck.

Azek white railing

Costa1

Azek white railing on back of house.

Costa2

Back of house showing Azek railing.

Costa3

Hot tub on top of white deck

Costa4

Dream Brewster Bathroom Remodel 

Coming up later this summer, our team will transform a rabbit warren of a bathroom in Brewster into a stunning spa like retreat.  This bathroom remodel will be a total transformation featuring a curb-less shower, tile and fixtures from Italy throughout.  We'll install a heated floor, a complete custom shower configuration as well as a floating mahogany counter topped by vessel sinks and wall mounted faucets.  This will be an exciting project that will be documented from start to finish.  Be sure to check back for updates on our blog.

Creating A Fabulous New Bathroom In North Falmouth!

May 2012 Finds the team from @designREMODEL working on a new bathroom project in North Falmouth. We just completed a kitchen remodel in West Falmouth and we just updated a deck for a long time client also in North Falmouth.

Located across the street from North Falmouth Elementary school, the owners of this Cape house enjoy a transformative first floor bathroom makeover that we completed back in 2009. In the interim we completed other projects as well.  In fact, one day this pass winter, I was driving by the house and noticed that the homeowners had some new landscaping done. I sent an email to them complementing them on the work and I got an immediate response:  "John, I was just thinking that I needed to contact you this week about getting our second floor bathroom remodeled and there you are in my email box!"

As my clients were very happy with the quality and durability of the fixtures, fittings and finishes in the first bathroom we had remodeled. Because of this, it was a fairly short, yet complete decision process on how the 2nd bathroom was going to be transformed.

Day 1. We completely gutted the entire bathroom down to the wall studs.

Day 2. Taking out the cast iron tub was no easy task. Fortunately it was a straight shot down the stairs and into the demo trailer! We had taken up the top layer of flooring and this allowed us to re-secure the sub floor with screws. We then put down a new lay of 3/4" plywood with lots more screws.  We had a number of squeaks, but Bob really made sure he eliminated them! A new wet wall at the end of the tub was built. At this time, we also removed the old window and shifted the framing over about 2' as it was too close to the new tub location.  Quirky side note. In opening up the wall, we found that old window framing that had been closed up in the past and thus this was most likely the 3rd time, the window had been relocated in the history of the house!

Day 3. Completed the install of a new Andersen window, then installed new exterior sidewall. Moving inside, we continued to set up for the plumber.

Day 4. The plumbers arrive and quickly set about their work. First, they demolished the old heat and rerouted the heat line under the floor. (This bathroom will have new in-floor radiant heat.) Then they removed and relocated the vent, waste and water lines as the tub and vanity, have switched locations.  At the end of the day, we set the new tub into a supporting bed of structural mortar.

Ball_Bath_2012

Day 5. Around the new tub, we installed blocking for balance bars and padded the walls as needed to allow the cement board to slide down past the tile flange on the tub. Adjustments were made in some of the framing else where in the bathroom and we also installed hurricane clips on the exposed rafters. We also installed a new fan/light fixture over the tub and then went up on the roof to remove shingles and install the fan exhaust port. While up on the roof, we also fixed a leaking, improperly installed pipe flange at the same time.

Day 6. The electrician arrives and removes all of the old wiring in preparation for a completely new rough including new home runs back to the service panel.  We had made his job easier by leaving out a section of the flooring and exposing the top of the wall on the wall below. This allowed him to fish new wires or home runs back to the service panel in the basement much faster and easier. This rough-in takes well over 8 hours to complete.

Day 7-8. Plumbing and electrical inspections conducted by the town of Falmouth are completed and passed.

Day 9. We install the newly upgraded insulation as mandated by code in the exterior wall and ceiling.Eladio Gore, Falmouth's Building Commissioner, stops by to sign off on the framing and insulation inspections. After his visit, cement board is installed around the tub and the final prep before the wall board is installed is completed.

Day 10. New plaster board is installed on the walls and ceiling.

Day 11. Plaster is skim coated onto all walls and ceilings and allowed to set.

Warmly Yours floor heat installed. Now dry fitting Ditra. (Orange layer) on top

Day 12. Next up is the installation of the in-floor radiant heat. We use a product from Warmly Yours, which makes a heat element woven into  mesh. Installation requires you to take your time to plan and then properly install while avoiding damage to the product.

Day 13. Our tile setter John, trowels a layer of thinset over the newly installed heat mat and will allow it set up before returning the next day.

Day 14. Over the thinset and in-floor heat, John now installs a product called Ditra. This is an isolation membrane that is secured with thinset. Ditra provides significant support for the tile while allowing movement by the substrate, thus avoiding grout popping or tile cracking.

Day 15. After setting the tile, John returns one more time to float grout into the joints of his tile install. When mixing the grout, he adds a product called Grout Boost which improves the stain resistance of the grout making it easy to keep the grout clean.

Days 16-20. We are in the home stretch! We start the week by installing a new cherry vanity and linen storage. We also install wall cabinets over the toilet. Then we trim out the window, door and install new baseboard scribed to the tile floor. On the vanity, we install a nice one piece Swanstone counter that has a integrated sink and backsplash.

Around the tub, we install the Swanstone surround on the walls and ceiling. Into the surround, we also install a large storage alcove and balance bars for safety.

Our painter Kemp, from Panda Painting works his magic by prepping, priming and painting the walls and ceiling. He then also stains all of the woodwork and after filling all of the nail holes, applies multiple layers of polyurethane to complete his work.

Meanwhile the plumber Al, has returned to set the toilet, connect all of the waste and water lines, install the vanity faucet and drain, then complete the tub/shower trim.

Right behind Al comes Richard, AKA Sparky, who wraps up the floor heat install by connecting and installing the digital control pad. He then completes the trim out of the recessed lights and installs the sconces over the sink.

Finally, (Are you going whew! yet?)  We drill and install the knobs at the vanity, change out the hinges and door knob to the bathroom with all new shiny chrome hardware. (Cape Cod salt air is tough on hardware) Install a new wood threshold at the bathroom entrance.

We also install the Ark Shower panel at the tub. Then our final touch is to do a complete clean up working our way out of the house.

Then we turn the bathroom back over to our clients Lary & Sue Ball who comment, "You've absolutely delighted us once again!" 

The following week, we are visited by the town's inspectors who pass the work of our talented trades.

Below are some iPhone pictures of the final result.

Ball1

Ball-1

Ball2

Ball3


10+ Insider Tips For A Better Bathroom Remodel

10+ Tips To Make Your Bathroom Even Better.

1. Make sure there is adequate support under your new floor tile.  Typically 1.5" is sufficient.

2. Have blocking installed in tub or shower walls for later installation of balance bars.

3. Install a simple timer on your exhaust fan and run it for 20 minutes after showering.

4. If you have stained wood in your bathroom, finish it with a polyurethane to block mildew growth.

5. Do not use a flat paint in a bathroom. Use a washable paint.  Most paint brands have bath or kitchen specific paint.

6. Consider a second mirrored recessed medicine cabinet in addition to the one over the sink.  This can be installed on another wall else where in the bathroom. You can specify an extra deep model for more room and can even order them with built-in electrical supply.

7. Roll out metal baskets in a vanity may provide more storage for less money then drawers.

8. Curved shower rods with a hook-less liner provides more elbow room and you can quickly remover the liner for washing when needed.

9. Hinged spray panels keep water in while providing ease of access to the tub.

10. If your toilet sweats, specify an insulated tank on your new toilet.

+.  Invest your money to remodel your bathroom once. With the right materials and built for longevity, you will enjoy your new bathroom worry free for many years!

4+ Reasons Our New Cabinet Line Is Perfect For Your Upcoming Cape Cod Kitchen Remodel

cabinets_large_10

1. Bead Board Wainscot:This is a timeless look that when done right lends an air of elegance to a bathing space. Notice the emphasize on done right? I've seen far too many bathrooms with cheap bead board paneling from the big box stores slapped up on the walls and finished with a flimsy molding. To be blunt, it's cheap to install...and looks it. We use a product made by Nantucket Beadboard for our wainscot. (At some point in the future, I will put up a post about installing and finishing beadboard.)

2. No Middleman. No Overpriced Showrooms. Leveraging the power of the Internet to bring you quality cabinets for your kitchen, bath and laundry room.  We buy direct from the manufacturer and handle every aspect from design to installation to final clean up.

3. Fast Turnaround Time.  We can be installing your kitchen in as little as 2 weeks from the time your order is placed. Many other cabinet lines are running 8 weeks or more.

4. Touch and Feel in the comfort or your own home. We'll bring door and finish samples for you to review. This will help avoid the feeling of been overwhelmed in showrooms filled with far too many options and choices.

+. Relax! We handle the details from beginning to end. No salesman handing your project off here. We'll work with you every step of the way to create the Cape Cod kitchen of your dreams: Installed right, as quoted and on time!

designer-paint-collection-carbon     storage_large_pc

Top 5+ Bathroom Remodeling Requests On Cape Cod

We remodel a lot of bathrooms here on Cape Cod and that provides us some insight in to what homeowners want when they remodel. Below are the top 5+ requests from Cape Cod homeowners who are looking to improve their bathrooms.

bathroom31. Bead Board Wainscot: This is a timeless look that when done right lends an air of elegance to a bathing space. Notice the emphasize on done right? I've seen far too many bathrooms with cheap bead board paneling from the big box stores slapped up on the walls and finished with a flimsy molding. To be blunt, it's cheap to install...and looks it. We use a product made by Nantucket Beadboard for our wainscot. (At some point in the future, I will put up a post about installing and finishing beadboard.)

2. Pocket Doors: I personally love pocket doors. In my dream home paid for by the shares I own in Facebook*, I would make just about every door into a room a pocket door topped by a transom window. (To do this requires 10' ceilings.) I really like how you can slide a door out of sight, as it makes a room seem larger and more open especially in a bathroom that is tight for space. Some people don't like pocket doors as they have had problems with them and I cannot blame them, as I have seen some atrocious installs over the years. And yet, pocket doors can be be trouble free if done right. The secret is patience and taking the time to plumb and level the door at installation and using ALL of the hardware supplied by the frame manufacturer.

Cost: Professionally installed beadboard, capped with trim and baseboard  will add $1200-$1500 to a typical bathroom remodel. (Finish painting is not included in the above figure.) 

* I don't own any shares in Facebook. Although I wish I did!

3. Tall Everything: The days of stooping over and brushing your teeth at a 24" high sink are over. Just about every vanity we have installed in the last few years, finishes between 34" and 36" in height. Much more comfortable for many users. Toilets are also available in what is now known as comfort height. (AKA. chair height.) We also install shower controls and shower heads at a tall height for ease of use. One thing I usually do at the planning stage is to ask my clients to share with me, what heights would be comfortable for them. This small request can make a big difference when they start using their newly remodeled bathroom.

Cost: Upgrading to tall everything usually costs 15% or more over standard height items.

4. Tubs into Showers: Many of our projects involve converting a tub into a showering space. This is an increasing trend as many homeowners are electing to stay put and make their house on Cape Cod, a "Forever home." In doing so, many homeowners are looking at how to create one level living by having all of the main rooms on the same level. (Usually the first floor.) Often times, we replace the 5' foot tub with a step in shower of the same length and width thus creating an easily accessible, safer and spacious showering space.

Note. Converting a tub to a shower on the 2nd floor is rare because the Massachusetts building code requires upgrading the existing 1-1/2" drain line to 2" drain line for a new shower install. This often requires opening up a significant portion of the floor to locate and tie into the main drain. Thus can be pricey.

Cost:Professionally installed tub to shower replacement including new controls, shower head, etc. and repairing the walls around the unit, usually start at about $3100. (First floor only.)

5. Tile and Glass: Along with converting the tub to a shower, we're seeing more tile shower surrounds and clear frameless glass doors. The tile will often have a decorative element and many projects will have the tile all the way up to the ceiling as well as on the ceiling. One suggestion we make, is to have a solid surface or cast iron base rather then tile for a cleaner look and to provide for easier cleaning. The glass doors which can be bypass or swinging doors allow you to see the tile work and adds a rich elegance to the bathroom. We often specify the 3/8" or 1/2" thick glass, especially for the bypass doors as the thinner glass rattles when you slide it from side to side.

Cost:Professionally installed shower surrounds with tile and glass. Usually the most expensive part of any bathroom remodel. $8,000 and up.

+. Laundry Center: We have had quite a few bathroom remodels that istackable-washer-dryernvolve taking a space within the bathroom or from an adjacent room or closet and converting it to a Laundry Center. Because of space constraints. Most of them require the use of a stacked washer/dryer instead of a conventional side by side washer/dryer. Creating this space, added significantly to the cost of the bathroom remodel and yet, every client we have done it for, has said it was well worth it! Cost:Hard to pin down as many factors involved. $1800 for a basic relocation to $4500+ for a complex install. Does not include stacked unit which can run $1200 to $4500.

There you have it, the top five+ requests for features in a bathroom remodel from your fellow Cape Cod homeowners. It's my experience that any bathroom that has any or all of the features above makes the overall project far more worthwhile!

If you have any questions about the projects noted above, send me an email to JSC@AtDesignREMODEL.com

Remodeling Costs On Cape Cod

We frequently get inquiries about the cost of remodeling projects here on Cape Cod. Given that every house, project and homeowner is different, it can be challenging to provide a specific number without going through the process of looking at every aspect of a project which is time consuming. Design, selecting products and fixtures, calling suppliers and trade partners. Which can on average take about 8-12 hours on a small bath remodel!

Enter Remodeling Magazine , which is one of the best trade magazines for Remodelers and for the last 23 years, has undertaken the research, leg work and math on an annual basis on the costs of a wide range of projects. Below are some examples of projects that we extracted from their data. These are similar to projects that @design REMODEL has completed for clients across Cape Cod.

1. Basement Remodel  $66,675 2. Bathroom Addition  $40,753 3.Bathroom Remodel  $17,460 4.Minor Kitchen Remodel  $19,885 5.Major Kitchen Remodel  $58,982

For the most part, we have found that the project costs compiled by Remodeling Magazine are consistent with what we and others in the market are charging. While there is variation from project to project, the averages are right in line with reality.

In many ways, the costs of remodeling have followed a similar trajectory of the cost of purchasing a new car or truck. Costs have escalated as manufacturers add new features, use new materials and add higher labor costs, research and development and regulatory compliance, it all adds up!

It's not all unusual for a new fully loaded SUV to cost upwards of $60K much like the Major Kitchen remodel listed above at about $59K. Yet, after 5 years, most vehicles are heavily depreciated and you are ready for a new one. The kitchen on the other hand, is only one quarter into it's life expectancy of 20 years!

Note: The costs above are averages for New England and are for projects considered "midrange" in scope and cost.

“© 2011 Hanley Wood, LLC. Complete data from the Remodeling 2011–12 Cost vs. Value Report can be downloaded free at www.costvsvalue.com

Cape Cod Kitchen Design & Usability Idea: Lighting

Lighting The Way Many of the Cape Cod kitchens we remodel, usually need lighting upgrades as the existing lighting is insufficient. I've seen kitchens lit by a single fixture located in the center of the ceiling and complimented by a small light over the stove. Lots of shadows in those kitchens! Even worse, are kitchens lit up by industrial florescents that flood the space with blindness inducing bright, sterile, white light.

The right lighting in a kitchen can make it safer to work in, easier to see (especially as we get older) and can create a warm, welcoming feel for everyday use or while entertaining family and friends. With forethought and good planning, this is easily accomplished in any size kitchen.

Let's review the types of lighting typically used in most kitchens.

Types of Lighting Overall This type of lighting is the most common, it can be a simple centralized fixture mounted on the ceiling or multiple fixtures either recessed or surfaced mounted and placed at different locations around the kitchen. Properly selected and placed, these fixtures can provide for most of your lighting needs.

Task When you really need to shine light on your workspace, task lighting is the way to go. In a kitchen, this will usually mean lights mounted on the underside of the upper cabinets. Having lights properly mounted as such, will flood the counters and workspace with lots of light. For task lighting, I would recommend that LED lighting be installed as it provide multiple benefits in reduced energy use, less heat shred then other types of fixtures and LED'S provide bright and dimmable lighting. It's interesting to note that the Starbucks coffee chain recently retrofitted their stores with LED lighting which significantly reduced their energy usage and costs.

Also, task lighting can be a overall lighting fixture placed in a specific location. An example of this, is installing a light over the sink area with a high wattage bulb that floods the sink with light.

Mood

If your kitchen is large enough to function as a entertainment space, then the right mood lighting can create a warm inviting feel that may make it difficult for guests to leave. It's possible that the right lighting, will make food look and taste better. Although some dishes will be beyond rescue! We often create mood lighting in a kitchen by simply replacing standard switches with dimmer type switch's which will allow you to control the intensity of the light.

Types of Fixtures Recessed Light

Ceiling Recessed is the most popular type of fixture used for overall lighting. They come in multiple sizes and style of trims. (Trims are the decorative surround that the bulb sits inside.) You can also install low voltage lights especially if you want a small, low profile light fixture. Usually you can use a flood type bulb or a focused beam bulb in these fixtures depending upon where and what you want to illuminate.

Be sure to install IC type recessed fixtures (As shown right) anywhere that they will come into contact with insulation. This allows for the insulation to be installed up to and over the fixture. Do not use non-IC fixtures below a non-heated space such as an attic. Doing so, essentially creates holes in your ceiling for heat to escape and will increase your homes energy usage and costs.

Blue Surface Mounted. We have had kitchen renovations here on Cape Cod where we have specified the use of surface mounted fixtures. In some cases, the period style and age of the home made it an appropriate choice and other times, high ceilings allowed for hanging fixtures. Surface mounted fixtures can create style and bring color into your kitchen as shown in the picture to the left. If a kitchen has an island, we usual install pendant lights over it and then install recessed lights in other areas of the kitchen.

Wall Sconces. Although rarely used in a kitchen, if you have the wall space and it's in an ideal location, a wall sconce can add style and set a mood. With a dimmer, it can also function as a nightlight for those late night raids on the fridge!

Under Cabinet lighting works great in really lighting up workspaces and we often use dimmable LED lighting under our cabinets. One tip: Make sure the fixtures are mounted in the front of the cabinet not the back. Installing the fixture forward, brings more light out over the countertop and makes the fixture it's self less visible.

In Cabinet Lighting can also create a fabulous backdrop while showing off your Waterford Crystal collection. Typically we use dimmable "puck" style fixtures mounted on the ceiling of the cabinet. Another tip: Replace the wood shelves in the cabinet with glass shelves to really allow the light to shine through!

Here are some links to some of our favorite light fixtures.

Rejuvanation.Great period fixtures and fabulous quality!

Hubbington Forge.Very elegant old world fixtures.

Restoration Hardware.Love the mix of old and new.

Hopefully, I've lit the way forward in helping you select the right lighting for your new kitchen! Feel free to comment or ask questions.

West Falmouth Kitchen Remodel: Start to Finish

This month finds us remodeling a kitchen in West Falmouth. This kitchen remodel will replace a typical eighties builder grade kitchen which primarily consisted of laminate cabinets and counter tops. The redesign of the kitchen improves the look, layout and provides for more storage. The Homeowners selected a frameless cabinet in a natural maple finish manufactured by Dewils.. The countertop will be granite and the apron front deep stainless steel sink will be a focal point in this kitchen.

Follow along as we document the progress, the challenges and the final outcome in this soon to be fabulous makeover! IMG_5442

Demolition of the old kitchen was tacked by the homeowners. They did such a good job, that I asked if they wanted to hire on as my demo crew! When we arrived to start, the space was clean and ready for us to take over. The old cabinets and counter tops were recycled into storage/workspace in the garage.

IMG_5450One of the first things we did, was set up a dust wall with a zipper door as shown in the picture at left. This dust wall will help keep the spread of dust to a minimum.

IMG_5462 As shown in the picture above, our first task was to remove a section of the drywall so the Electrician could update the wiring and placement of assorted electrical devices. We also needed to provide a new backer or substrate for the tile back-splash to come. If you look at the picture closely, you will see that the seams will be hidden by the base and upper cabinets. We also removed just over the width of a standard drywall width of 48" This will allow for faster and neater installation of new drywall.

We also removed some of the plywood on the floor as it was damaged and weak in some spots. Unfortunately at this point, we discovered that the sub-floor consisted of 1/2" plywood which is insufficient to support the new tile. A typical-sub floor will have at minimum, 3/4" thick plywood supported at all edges.

It was decided to install an additional layer of 1/2" plywood laid perpendicular to the existing sub floor to provide more support under the large/substantial tile that is going to be installed.

IMG_5464

The picture above shows the exterior wall where we are preparing to open up and install an additional window while replacing the window on the left with a new Andersen gliding window. We will need to relocate wiring and carefully measure placement of the new windows, as we plan to install several receptacles and switches between the window bottom and the top of the counter top. Space will be at a premium here!

IMG_5472

Meanwhile on the exterior, we have constructed and set up staging over the stairs. In this picture, we have carefully removed the existing shingles for reuse around the new windows. Soon this wall will show two new Andersen gliding windows!

Next up, is framing the window opening and preparing the flashing system for the windows. As you can see in the photos below, we have added an opening for the new window and now we are preparing the openings with flashing on the sill and around the edges.

IMG_5490 IMG_5489

The windows are now being set in the openings. At this point, we make sure the windows are level and square before securing them permanently in place.

Here is a picture of the exterior with the shingles that were saved during removal, now reinstalled around the new windows.

IMG_5515

On the interior, the window framing is complete, the electrician has completed his rough wiring and new insulation has been installed as seen in the photos below. At this point, we have gotten the inspections we need from the town and are now ready for the installation of the sheetrock.

IMG_5513

Just before the sheet rock is installed, we cover the insulation on the exterior wall with 4 mills plastic which acts as a vapor barrier. You can also see on the floor, that we have installed new plywood fastened with screws. This additional layer of plywood, will provide strong support for the new tile.

Coming up: Mud-time! The seams on the drywall will be coated with mud-aka Joint compound which will hide the seams. We'll also be slapping mud or thinset down on the floor as we install new tile.

IMG_5559-1

In the above picture, you can see that the team from Spooner Drywall has worked their magic in patching the walls. They also worked magic on the the ceilings which have the dreaded popcorn finish on them. In fact you cannot see any evidence where the ceiling was patched at all!

On the floor, the bright orange covering you see is a product called Ditra which is a provides great support under tile and also isolates the tile and grout from the movement of the wood below. Ditra is used by professional tile installers the world over. Here, the Ditra is has been dry-fitted and is awaiting the tile setting to trowel down a layer of thinset mortar over the plywood. He will then embed the Ditra. The tile setter will trowel more thinset onto the Ditra and set the tiles. Going through this multi step process will ensure a strong floor that resists movement and cracking.IMG_5583-1 Here is a snapshot of the cabinet install in progress.

IMG_5577-1 The space above is for the sink base and you can see how planning ahead avoids many problems later. 1. We left out a section of tile to make it easier to install the water piping. If we did not, the plumber would have to drill through the tile inside a very confined space. 2. We drilled the holes for the water piping ahead of time. 3. These cabinets require a site built base and in building the base for the sink cabinet, we created a chase for the piping for the dishwasher to be threaded through in the right hand corner.

IMG_5579-1 As shown above, the sink base is now installed and you can see that multiple holes have been made to accommodate the plumbing, electrical and the new sink.

IMG_5580-1 The picture above shows the stainless steel sink now installed. Coming up. Bumps in the RoaAs you can see in the

As you can see in the pictures below, all of the cabinets are installed and the granite has been carefullly put in place and then we hit a couple of bumps in the road.Dunphy-Stove

Turns out the interior finish on this stove was defective. The homeowner decided that they wanted to replace it with another brand which in turn required returning the over the stove microwave. This delayed installing the backsplash tile.

On top of this, the weight of the refrigerator punched a hole in the tile as we were shifting it in to place. If you look at the photo below, you can see a round hole punched through the travertine tile which is somewhat a delicate tile. The kicker was, that the damaged tile was partly under the refrigerator side wood panel which would have to be removed so that the tile could be replaced. This in turn held up the completion of the upper cabinet moldings...

Tile_Punch Fortunately, replacing the tile was a relatively simple if a bit messy task that was done quickly and efficiently by the tile installer.

At the start of the tile install for the backsplash, it was found that the varying thickness of the different tiles did not work well together. The homeowner decided to go with a different look as you can see in the pictures below.

Tile-1

Tile-2

All Wrapped Up and Done!

Dunphy5

Dunphy3 Dunphy2

Cape Cod Kitchen Design & Usability Idea: Storage

This is the first in a occasional series of tips about designing and making more user-friendly your new kitchen. Storage for pots and pans.

It makes me crazy to see kitchens with nothing but marching rows upon rows of doors. Why? because it usually means that the cook is wasting time and steps every time they want to retrieve cookware from the cabinets below.

In many kitchens, the cook will stoop down, open a cabinet door, reach in and roll out the tray within to select a piece of cookware. Then they have to roll the tray shut and close the door. Not a big deal, yet multiply that many times over the course of cooking meals and it gets a bit annoying doing the multi-step.

A stove to die for!My solution in many of the kitchens I've designed and built, is to specify a base cabinet or two as all drawers. Usually they are at 32"- 36" wide and have one shallow top drawer and two tall drawers below as shown in the picture to the left. This set-up allows for stacked storage of pots and pans and in one motion allows you to open, view and retrieve your cookware. Plus, having an entire base cabinet all drawers will break up the rows of marching doors.

Be sure to specify heavy duty full extension hardware on these drawers as the pots and pans can add up in weight.

I also like doing this as it allows for a really wide top drawer to store cutlery and cooking tools all in one place and still keep them neat and organized.

There are a number of storage options for cookware such as pot racks and corner cabinets but just having nice big drawers appeals to my practical nature. Out of sight, out of mind, yet easy to see and use!

Wow! Something New In The Kitchen!

Recently, I came across something called The Galley and I was immediately intrigued. While the concept of Work Zones is not new, The Galley takes it to a new level in creating a better functioning and more efficent kitchen. If you love to cook and spend lots of time working in a kitchen, watch out! because you are going to fall in love with and will want to have The Galley in your kitchen. Last warning...watching the video will cause you to want to immediately remodel your kitchen...

Sitting In The Shower

9926Sometimes after a long day of chasing the clock, it's heaven sent to be able to escape to a long hot shower while having some ME time. Yet in most showers, it's standing room only. Have you ever wished you could take a seat while showering? Just to be able to sit back and let the hot water stream over you? Unfortunately the size and design of some shower stalls will not allow for any kind of seat. If your shower is at least 34 x 34 in size, you maybe in luck. Before purchasing any kind of seat, be sure to measure your space to see if it will fit while someone is using the shower.

We've installed a number of fold up seats like the ones shown to the upper right. There are some advantages from using a fold up seat over a fixed or built-in seat. Fold up seats take up less room, are less expensive to install vs. constructing a fixed or built in seat. Plus the wood seat is warmer to sit on then tile or stone.

One thing to keep in mind is that good structural support or blocking needs to be in place behind the shower prior to installing any kind of folding seat. It may be possible to install the blocking behind the shower from an adjacent room. Consult your local remodeling professional to see if this is feasible.

I recently discovered in one of my professional trade magazines, the Serena Seat which is pictured to the right. It's clean look and ease of use had an immediate appeal. It's easy to install on a properly prepared shower wall and has a back rest to lean against. When folded up it only has a 3-inch profile. It also has a precision tension hinge which prevents the seat from accidentally falling down. The wood is brazilian walnut which is up to 3 times stronger then teak.

Fixing a Remuddle: A Bathroom Remodel In Sandwich MA

We just wrapped up a bathroom remodel in Sandwich. This was interesting as we were undoing the previous remuddle which the homeowners absolutely disliked. This tiny bathroom had a massive 6' whirlpool tub that drained the hot water heater when it was only half full. The size of the tub also led to knocking knees every time someone used the toilet! Danger! Floor Collapse Ahead...! Interestingly enough, when we demolished the bathroom interior, we found baby blue chips from the cast iron tub that had previously been occupied by the whirlpool tub. This tub also took up precious closet space. During the demo work, we found floor joists that had been mindlessly hacked apart thus weakening the floor structure. The substrate behind the previous tub/shower surround was awful as it was simply a mix of sheetrock and cement board with no water-proofing at all!

New Archer Tub From Kohler We installed a new Kohler Archer tub in the original location and rebuilt the closet. This closet rebuild provided the homeowners with much needed storage space. Around the tub and on the ceiling, we installed Durarock cement board followed by a roll on waterproofing membrane. Making for a water tight tub/shower space.

The homeowners selected 8x8 gloss white tiles complimented by a narrow row of glass tile. This tile was placed around the tub as well as on the ceiling. On the floor, we installed a Ditra isolation membrane followed by a 12 x12 floor tile. This was finished by a curved shower rod. This shower rod created more room in the tub/shower when needed.

Snakes N' Sparks! The electrical work was a bit of a snakes nest as the electrician had to eliminate the illegally buried junction boxes and untangle the mess left behind. The switches for the bathroom were moved back into the bathroom where they belonged. Time was also taken, to relocate the plug at the sink at a taller height so that it was no longer practically sitting on the countertop. We also installed a Panasonic fan/light combo that is whisper quite. This replaced the F15 engine that was mounted in the ceiling.

Fast N' Furious This remodeled remuddle was completed in less then 15 working days and provided the happy homeowners in Sandwich, with a new bathroom that was roomier and far more functional.

Happy Homeowner The homeowner posted the following review on Angie's List..

john_quote
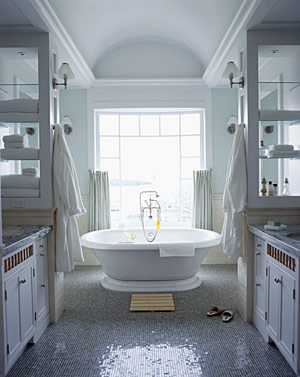
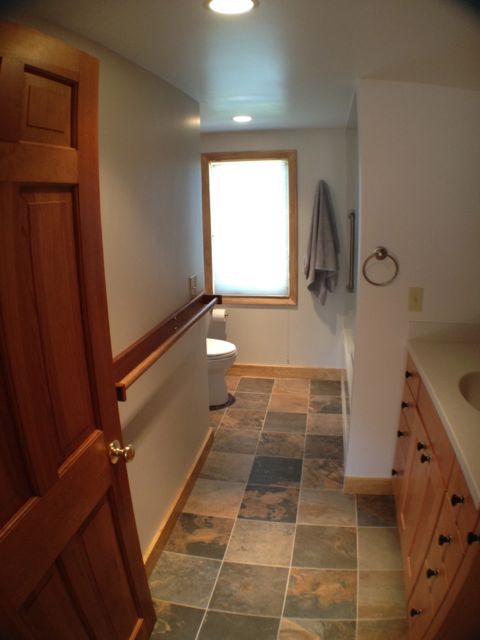
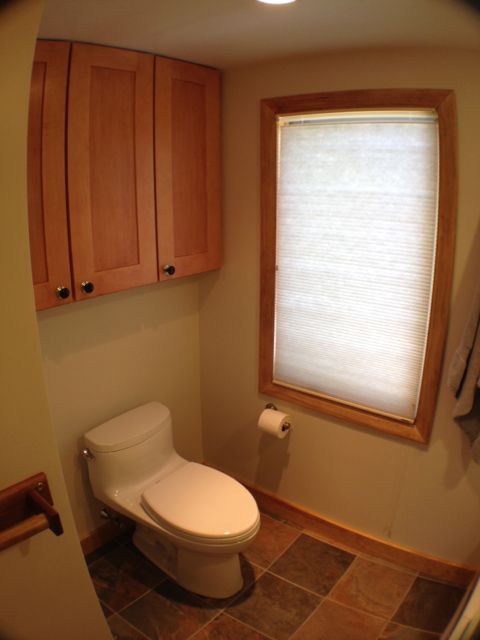
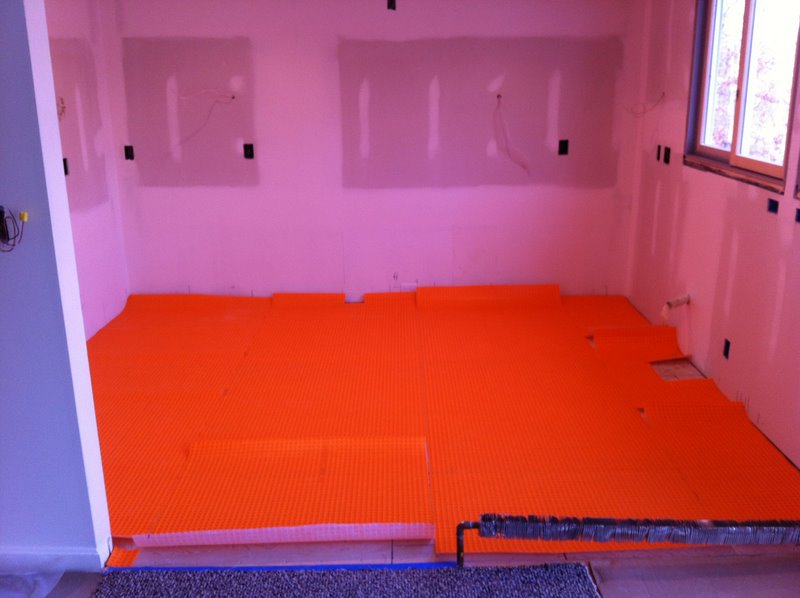
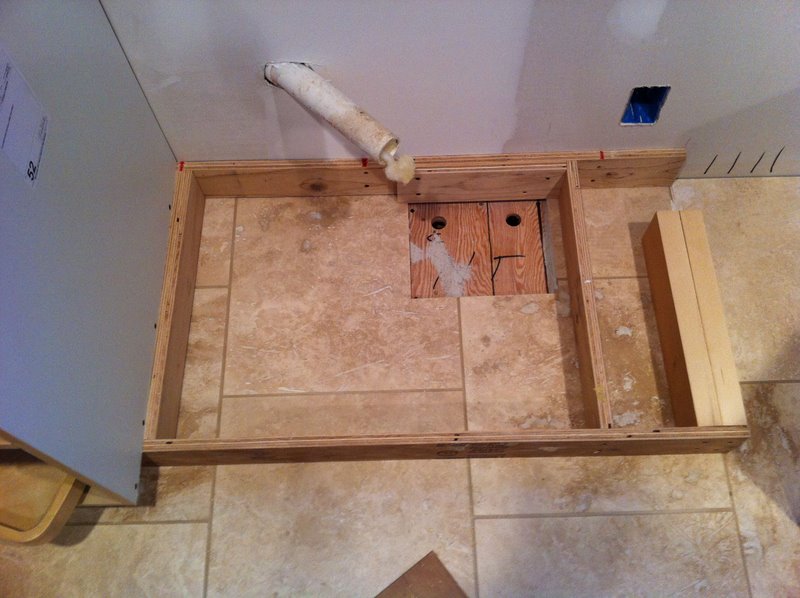
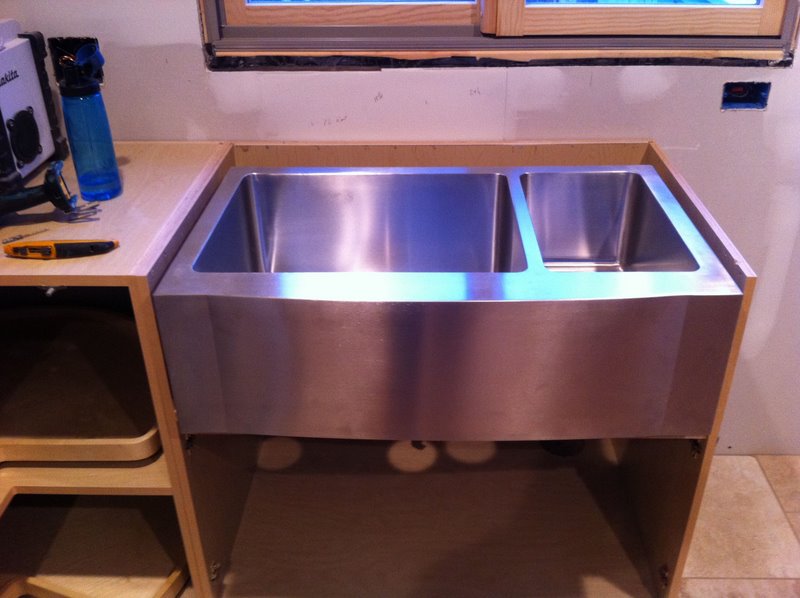
We are very happy we chose the right person to remodel our bathroom. John impressed us in many ways. He was very thorough. He kept the worksite and our house clean. He was always upbeat. The fact he likes his work shined through. We also liked the fact that he did much of the work himself. The workers he did bring in shared his work ethic; they were all excellent. Many contractors do an "OK" job, John and his team did an excellent job.
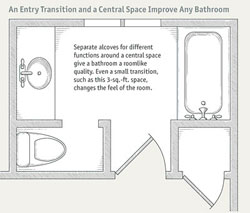