The Countertop is One of the Most Important Parts of the Kitchen: Choose Wisely

Any experienced  kitchen remodeler knows that their clients must take special care when choosing the countertop material for their new kitchen. We have been in the remodeling business for nearly 20 years. We’re familiar with the ins and outs of intricate design and the implementation of the right materials in the correct places. Several options are available for kitchen countertops, so we make sure to discuss this at length with our clients. Here is some information and a few tips on choosing the right countertop material for your needs and lifestyle.

Materials

Countertop materials range quite drastically at times in both quality and price. Each type of countertop has a place and a purpose. You wouldn’t, for example, want to put a lovely and expensive marble countertop in the laundry room where no one would ever see it. This would be the ideal spot for a less expensive laminate counter top. Let’s look at a brief overview of material types:

  • Marble: Extremely luxurious, but not as durable as some people believe. The acids in lemonade can etch marble and damage the luster. Wine and other heavily colored liquids can stain it. Some people want this because it’s a way to 100% customize their home and keep all of those spilled wine memories in view to be cherished.

  • Granite: Very luxurious and available in a wide variety of qualities and designs. It is very stain resistant, scratch resistant, and heat resistant. Homeowners enjoy years of worry-free enjoyment when it is properly sealed and maintained.

  • Laminate: One of the more affordable and less luxurious options. Laminate is plywood or particle board with a decorative sheeting glued to the surface. It resists water and is extremely easy to clean and maintain. It does stain when it comes into contact with wine, juice, or other colored liquids.

  • Quartz: A nonporous natural stone that never requires sealing, unlike granite. It is extremely easy to clean and is resistant to heat, water, bacteria, and stains. Quartz countertops are available in a variety of color options and are a great choice for busy families.

  • Solid-Surface: A nonporous acrylic material that provides a perfectly seamless appearance. They’re very low maintenance, and available in a wide variety of colors and patterns, including some eco-friendly options. They’re available with an integrated sink and backwash for added convenience.

  • Butcher Block: Perfect for those homeowners who seek to create a rustic appearance. Butcher block countertops provide the durability of solid wood and the beauty of nature. They’re available in a variety of grain types and they’re very durable.

  • Concrete: A material that is very heavy and very easily customizable. Some homeowners choose to customize their concrete countertop with broken glass or stains to make it appear as if it were another material.

  • Metal: Stainless steel or copper are the primary metal types used in the kitchen as a counter top material. Please keep in mind that copper is a softer metal so it may take damage over time. Stainless steel offers the appearance of an industrial or professional style kitchen.

Please make note that regardless of the type of countertop you use, it is always good to protect all surfaces from hot pots and pans.

Mix and Match Materials

Your custom kitchen design doesn’t have to go with the flow or match someone else’s idea of perfection. You are the homeowner, it’s your kitchen; let’s get creative. We can mix and match materials if you’re absolutely convinced that you want to use that lovely marble countertop even though you now understand that it may stain or become damaged over time. Use it in an area that is away from food and drink areas – a desk perhaps. This area can be a focal point that you tie into the rest of the room using other types of decor.

Call us at 508-477-9003 if you’d like to discuss remodeling your kitchen. We have some amazing designers and remodelers, and fall/winter is a great time to get your kitchen ready for the coming year. Allow us to show you how we can turn your drab kitchen fabulous and help you choose the right materials for each area.

11 Amazing and Disappointing Things to Expect During Your Remodeling Project

Most of the homeowners we work with during a remodeling project are unsure of what to expect during the process. We wanted to address some of the best and worst things about remodeling today. Of course we could tell you that the entire process is going to be puppies, rainbows, and butterflies, but… it isn’t. It’s going to be an awesomely messy process with some incredibly exciting high points and disappointing low points. Are you ready to see our breakdown of the process?

  1. Decisions – The tough decisions are generally made before any demolition begins. Other decisions may be made and changed throughout any phase of the process, but make sure to let us know sooner rather than later if you change your mind.
  2. Dust – Remodeling is dirty business. We will put up plastic to help protect the rest of your home from the construction area, but dust travels. Consult your HVAC technician to discuss the idea of blocking ducts that lead to or from the construction area to help cut down on dust.
  3. Noise – Power tools are loud. Nail guns, saws, drills, and sanders make noise, and all of those tools will be in use at various times, sometimes even simultaneously. Workers will be yelling back and forth looking for things and enjoying general chit chat on occasion while they work. Consider staying at a friend’s or neighbor’s house for the day while it’s loud.
  4. High Points – Every homeowner has specific things they want to see; or that they want to see gone. You may get super excited about the demolition if you hate your existing cabinets or excited about the new backsplash if you’ve waited for months to see it installed. Whatever you’ve truly been looking forward to will be tucked away in your memory as high points. Feel free to take pictures so you have that memory forever.
  5. Low Points – You’re going to get tired of whipping out your credit card or checkbook to pay for things. You’re going to get tired of having so many people in your house during working hours. You’re going to get tired of the mess and the noise. But hang in there, the process is only temporary, and your newly remodeled home will look amazing.
  6. Budget Issues – Regardless of how many times you checked and double checked pricing, some things will sneak up on you. Make sure you set aside 20% above and beyond the cost we quote you so when you decide you want to upgrade to the nicer countertop or fixtures, the money is there.
  7. Unexpected Surprises – We never know what we’re going to see when we start the demolition process in a kitchen or bathroom. We may run into water damaged insulation or serious water damage to the structural members of the house. We always hope for the best, but we just don’t know what the home has been through since it was built. Excessive water damage will have to be repaired before we can continue with the project.
  8. Delays – Aside from the potential delays created by the unexpected surprises we just mentioned, we may run into issues with the delivery of materials. These are things that we have absolutely no control over, so they frustrate us as much as they frustrate you.
  9. Changes – Changes to the layout or materials used during the remodeling process may increase or decrease the cost of the project, and often create delays. Most change orders come from the client. Let’s say you decide half way through the process that you want the Carrera Marble Brick Mosaic instead of the Natural Varied Mother of Pearl backsplash. We will probably have to order the new materials and work on something else in the meantime. It is, after all, your preference in materials.
  10. Stragglers – Little things that will need to be resolved as time goes by. This can include things that arrive broken or dented from the manufacturer. We obviously can’t use damaged goods in your remodel, so we have to send them back and request an exchange.
  11. Welcome (Back) Home! Self explanatory! Welcome back home; it’s time to invite friends and family over to help you enjoy your newly remodeled home.

The most important thing you can do is choose a trusted contractor on Cape Cod to remodel your home. We know the area. We know what to expect. We know that you need to be protected from the occasional Atlantic hurricane that wanders up the East coast. Give us a call at 508-477-9003 to discuss your upcoming project, an existing project, or the possibility of working with us. We’ll schedule an appointment for a consultation and show you why we’re the best choice for your project!

Choose High Quality Products for Your Whole Home Remodeling Project

Whouse House Remodel FalmouthEveryone has heard the old adage you get what you pay for; it’s true in most situations from electronics to homes. A cheap laptop may last six months where a high quality laptop will likely still be running strong a few years down the road. The Formica-covered particle board countertop will eventually absorb water and look horrible, but the granite or marble countertop will look amazing for many years. These are the types of things we’re going to cover in today’s post.We are homeowners as well. We understand the desire to save your hard-earned money where you can. But we also wholeheartedly recommend that you do not cut corners for the sake of money during your home remodeling project. Let’s take a look at a room-by-room analysis of places you should never go cheap for your whole home remodel. Kitchen Remodeling – The kitchen is the number-one remodeled room in the home for a variety of reasons. It’s often referred to as the heart of the home because this is where meals are cooked, families share dinners, and where we entertain family and friends on special occasions. This very important room in your home deserves the absolute best we can give it. We often tell homeowners to splurge on the kitchen and cut corners somewhere else during the remodel, because it has so much to offer the entire family. Bathroom Remodeling – The master bathroom is the second-most remodeled room in the home. Many homeowners are turning their small master bathroom into a luxurious getaway that rivals some of the nicest spas throughout the Cape Cod area. Your bathroom should be designed to help you relax after a difficult day, not have you cramming yourself into a tub that’s too small without any jets to massage your tired muscles. Invest in an oversized tub with jets so you can truly relax. Bedroom Remodeling – The master bedroom is much more than just a place to sleep, it’s your sanctuary. Create an amazing master suite that includes a bedroom, sitting area, luxury walk-in closet, and amazing bathroom. Add a few extra large windows to enhance the area and make it feel much larger. Quality Workmanship – Don’t overlook the importance of high quality workmanship. Our craftsmen at @designREMODEL are dedicated to providing the absolute best in overall design and workmanship. We work hard to ensure that your remodeling experience is as pain free as possible. The quality of our workmanship has nothing to do with the quality of the materials you choose. We will provide top notch work whether we’re working with high quality woods or particle board. Quality materials will cost more initially, but they will ultimately provide a much better finish and long-lasting beauty. We invite you to call us or text us any time at 508-477-9003 to get the scoop on the latest progress on your home remodeling project or to schedule an appointment for a consultation. We will work with you to design the perfect kitchen, bathroom, or whole home remodeling project, and then build it out for you in a timely manner.

How Remodeling Has Transformed in the Past 20 Years

As a remodeling contractor on Cape Cod for nearly 20 years, we have seen many changes in the remodeling industry. As with many industries that have embraced the information age, the Internet, and new technologies, we believe the the home remodeling industry has improved significantly. However, it's also been our experience that homeowners don't necessarily see how the industry has changed for the better, and thus some of them do not fully appreciate the value of a professional remodeling contractor in 2015.

The Good Ol' Days?

Remodeling Contractors on Cape Cod

Remodeling Contractors on Cape Cod

Back in the 1990s, and unfortunately this still exists today, homeowners didn't have very high expectations of home improvement contractors. Maybe you would talk with a couple local contractors, have them in for a walk-around and measurements, and they would give you either a verbal estimate or something scribbled on a yellow legal pad.

Over the next few weeks, they would show up intermittently in a beat up old truck and do their work. They never really seemed to have a schedule or defined way of doing things. You were never quite sure when they were coming and going and when your project would be completed.

But maybe you didn't care about the project timeline or how perfect everything was in the end, because the remodel likely didn't cost you a whole lot of money.

Home Remodeling Today

It's an understatement to say that many things have changed in 20 years. One of the key aspects of consumer behavior today is that consumers are more discerning than ever. With a world of information at our fingertips, we demand more from the companies that provide us with products and services.

Homeowners today want to be involved in the process as much as possible. They want to research different remodelers, they want to look at websites and Houzz profiles, they want to see reviews and testimonials, and when it comes time to design their kitchen or bathroom, they want to pick out the finishes, products, and materials.

They also demand a higher level of professionalism. They demand timelines and payment schedules. They demand cleaned work areas at the end of the day. They demand perfection when it comes to their home renovations.

And rightfully so.

You work hard for your money, and when you're spending a sizable chunk of it on a remodeling project, you want a professional experience and a first class end result.

Today's Professional Remodeler

A professional remodeler who is going to provide you with a best in class experience and remodeling project is different from the remodeler you hired in 1996.

Cape Cod Kitchen Design Company - @designREMODEL

Cape Cod Kitchen Design Company - @designREMODEL

Today's professional remodeler has:

  • The proper insurance

  • A valid contractor's license

  • Increased accountability

  • Higher safety and cleanliness standards

  • Better tools

  • Better and more products to choose from

  • Laws and regulations they must comply with

  • Multiple reliable work crews and subcontractors

  • Thorough written contracts

  • Multi-year warranties

  • Project timelines and payment schedules

All of those things translate into an overall better remodeling project for you and your family.

But all of those things also may translate into a higher price point than you were conditioned to paying 20 years ago.

Let's use the metaphor of the auto industry. That industry has vastly improved over the past couple decades - higher safety standards, more efficient cars, more luxury items included at base price, etc.

The difference is that you purchase a new car every few years and you're generally aware of the prices of cars.

When it comes to home remodeling, that's something you may only do once or twice in your lifetime. So you're not generally aware of what things cost. In order for a professional remodeling company to communicate the value that they bring to the table, they need to spend more time educating homeowners about processes, prices, expectations, and the lifetime value of a newly remodeled home.

Homeowners who hire a remodeling company strictly based on price, without doing much research or allowing themselves to be educated about the process, run the risk of getting a sub-standard project in the end. As with most things in life, you rarely get a high quality outcome from the cheapest price.

A home remodeling project is a big deal, so you want to make sure you spend the proper time and money to do it right the first time.

At @designREMODEL, our tagline is Elevating the Cape Cod Remodeling Experience. We have developed the systems and the workmanship to not only provide a beautiful new room or whole house remodel, but also as much of a stress-free experience for our clients as possible.

The Bottom Line

If you're researching different options and receive multiple quotes or estimates from Cape Cod remodeling contractors, you're going to see numbers all over the place. Some contractors are still operating like its the 1990s and their prices may be lower. But you should expect a more complicated homeowner-remodeler relationship and a lower quality end result.

Some companies, like us, will present estimates that provide us with the resources to deliver to you an excellent product with the experience that you deserve.

Price is what you pay. Value is what you get. ~ Warren Buffett

The remodeling market is very robust these days. Homeowners with higher standards are choosing to invest in their homes. When thinking about your next Cape Cod kitchen or bathroom remodel, we recommend that you take a little more time up front in the research and decision-making phase to ensure that you're getting the best possible value for your budget. Although you may be tight on time, allow yourself to be educated on your different options available to you and the outcomes you can expect from those different options.

"Working with John Clark was a complete pleasure. From the very first time we met John we felt very comfortable trusting him and his team to guide us with design selection to update our 35 year old bathroom. Everything John prepared us for before the work started was 100% accurate. During the demolition process we were amazed at how neat, clean, and professional everyone was. Communication was very open and there were no surprises. The finished product exceeded our expectations and we plan on working with @designRemodel for future projects. We highly recommend working with John Clark and his team of professionals!" ~ Hillary DiFilippo, Cape Cod MA

Design & Remodel Tip #1 for your Cape Cod Bathroom

Design Ideas. Marstons Mills Remodeling Tips. Best Practices. Find them here weekly on our blog.

Design & Remodel Tip 01- Tile Ideas

Cape Cod Bathroom Design Tips from @designREMODEL

Last week, I was looking for some tile ideas for an upcoming bathroom remodel in Marstons Mills. I wanted to find something unique for my client who had just purchased a new home and wanted to create a spa-like feel in her new bathroom.

I started looking on Houzz.com for pictures, particularly for either a serene backdrop or a distinctive accent tile. After scanning many pages and doing many searches, I became frustrated as I did not see what I wanted.  I took a look through some of the design books on my bookshelf and still didn't find what I was looking for.

Then  I thought...How about Pinterest.com?  I clicked over to the website and started looking at some of the boards for bathroom remodeling that I had set up several months ago.  Very quickly, I found pictures and ideas that could use for design inspiration for the upcoming bathroom remodel in Marstons Mills.

Plus, what I liked about Pinterest was that by using a few keywords like Bathroom Accent Tile,  I was able to review rapidly multiple pictures. And save the ones I liked to a board that I could return to again and again.

We are fortunate to live in a world where an abundance of ideas, tips, and photos are at our fingertips. This access to ideas is really exciting for us and for our clients, and it has enabled us to build some fun projects for Cape Cod homeowners.

If you would like to discuss some ideas for your bathroom remodeling project on Cape Cod, feel free to get in touch and we'll be happy to answer any questions or get you started in the right direction.

How To Spot A Poorly Constructed Bathroom

Often times I can walk into a bathroom of any age or style and immediately spot the small things that tell me if the bathroom was remodeled the right way or not. The giveaways...

Tile abuts fixtures, casings and baseboard.  Talk about looking like crap. The grout usually looks messy and when the wood shrinks from seasonal changes, cracks will start to show. Not to mention that the baseboard looks even smaller due to the reduced height.  And don't get me started on tiling in a vanity bottom instead of going under.  If someone wanted to change the vanity at a later date due to a style change, or if it was damaged, they would be stuck trying to match the exact footprint of the old vanity.

Beadboard paneling installed over the drywall.  This is another save-a-buck detail that drives me crazy. The paneling is usually so thin that it the bead detail is minimal and yet applying it over the drywall flattens any window or door casing profiles.  The proven way to install beadboard wainscot in a bathroom is to remove the drywall from the wall and apply the beadboard directly to the studs. This allows you to install a true beadboard and also keep the profiles/shadow lines of the window and door trim intact.

Tub or shower base is spongy. Just about every tub or shower installed over the last 40 years has been installed without regard to proper support under the base. I can step into and immediately feel if the base is properly supported or not.  It has give and feels bouncy. The correct way to install the base or tub is as follows:

1. Replace or upgrade the subfloor with new and or additional plywood. 2. Nail down wire mesh under the base or tub foot print. This is to help keep the mortar in place. 3. Mix and pile mounds of structural mortar over the mesh. 4. Bed the base down into the mortar and confirm that it is level. 5. Install temporary blocking around the rim or top to keep it from moving as the mortar cures.

Doing the above ensures that when anyone steps into the tub or shower, there is an absolute feeling of solidness. Yes, doing this while installing the tub or base is a pain and takes more time and money and it's worth it.

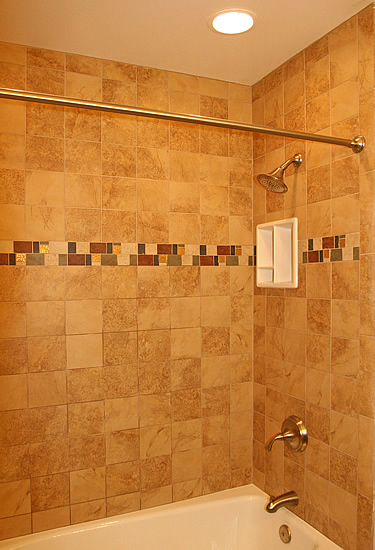
Falmouth MA Shower Remodeling from @designREMODELCheesy soap dishes or alcoves. This detail absolutely drives me crazy. Here is a picture of a tiled bathtub surround with a molded soap dish just slapped into the wall. Not only does it stick out like a large pimple on your forehead, they placed it right in the middle of the accent tile row.  Down. Right. Ugly.

Shower Doors.  Framed shower doors should be banned period. Not only do they look cheap and feel flimsy, the frame provides the perfect landing spot for soap residue which provide a breeding ground for mold.  Frameless doors are easy to keep clean and really take the overall look of your bathroom up a couple of notches.

Over reliance on caulking.  Caulking when used right has it's place in the bathroom. It keeps joints closed when a house moves due to seasonal changes. It directs water where you want it such as around the outer jambs of a shower door. However, I've walked into bathrooms where the caulking looks as if it were troweled on by the gallon and there is usually black mold growing by the minute.

These are some of the things to  spot in a poorly constructed bathroom.  In my next post, I will write about the details that make a difference in building a bathroom that looks fabulous for years to come.

Best of Houzz 2014 for the Second Year!

@designREMODELReceives Best Of Houzz Award

Remodeling and Home Design

Reveals Top-Rated Building, Remodeling and Design ProfessionalsAnnual Survey and Analysis of 16 Million Monthly Users

Mashpee MA February 4, 2014 – @designREMODEL of Mashpee, MA  has been awarded “Best Of Houzz”  for the second consecutive year by Houzz, the leading platform for home remodeling and design.@designREMODEL was chosen by the more than 16 million monthly users that comprise the Houzz community.

The Best Of Houzz award is given in two categories: Customer Satisfaction and Design. Customer Satisfaction honors are determined by a variety of factors, including the number and quality of client reviews a professional received in 2013. Design award winners’ work was the most popular among the more than 16 million monthly users on Houzz, known as “Houzzers,” who saved more than 230 million professional images of home interiors and exteriors to their personal ideabooks via the Houzz site, iPad/iPhone app and Android app. Winners will receive a “Best Of Houzz 2014” badge on their profiles, showing the Houzz community their commitment to excellence. These badges help homeowners identify popular and top-rated home professionals in every metro area on Houzz.

“Houzz provides homeowners with the most comprehensive view of home building, remodeling and design professionals, empowering them to find and hire the right professional to execute their vision,” said Liza Hausman, vice president of community for Houzz. “We’re delighted to recognize @designREMODEL among our “Best Of” professionals for customer satisfaction as judged by our community of homeowners and design enthusiasts who are actively remodeling and decorating their homes.”

With Houzz, homeowners can identify not only the top-rated professionals like  John Clark, but also those whose work matches their own aspirations for their home. Homeowners can also evaluate professionals by contacting them directly on the Houzz platform, asking questions about their work and reviewing their responses to questions from others in the Houzz community.

Remodel This House!

After moving to Mashpee about 8 years ago, my wife Tara and I decided that it is  finely time to make our Cape Cod Saltbox work better for us.  This 28 year old house had been neglected and needed tons of work to make it the way we envisioned. This house at the time of our purchase, was primarily used as a summer home and all the bathrooms and the kitchen were in need of updating. In addition, much of the house reflected the throw it up cheap, as fast as you can, mentally of the booming 80's  Along with remodeling the bathrooms and kitchen, this house is in need of  a new roof, trim work, siding and windows. In essence a whole house make over.

East Way BeforeDuring the spring of 2013, Tara sparked an idea when she mentioned that she would like to have a sun room attached to the back of the house. Her comment started the wheels turning in my head about adding on a larger space.  We had an extended discussion about what we would do with more space. We both agreed that it would be ideal to have a larger kitchen and dining area.  The old kitchen would then become a much needed mud room and the old dining room could be used as a multi-purpose space.

At that point, we were starting to get really excited about the possibilities and I was ready to roll.  But first we needed to figure out what made sense to remodel and how much it would cost. Well, it shouldn't be too bad...Right? As I was doing most of the work with the Tara helping as needed...

Much to my dismay, there were many surprises ahead, some of which I will share in my next installment of REMODEL THIS HOUSE!

Trend in Cape Cod Bathroom Remodels: Open Storage

Open Storage in Cape Cod Bathroom RemodelsSmall bathrooms are not an uncommon occurrence in older Cape Cod homes and cottages.  And the trend to open shelving in a bathroom, if done right, can make those small Cape baths look more spacious.  But bathrooms often have a lot of clutter; think cotton balls, towels, lotions, makeup, medicine, how do you contain all that so your bathroom actually functions well?

Use containers!  Traditional baskets work well for open shelving, they contain your clutter and look great in a Cape Cod style bathroom.   Wire baskets have that old time charm that many Cape Codders love and come in a variety of sizes.  See these for sale on Etsy:  http://www.etsy.com/search_results.php?search_query=wire+baskets&search_type=vintage

Bath towels can be rolled spa style or learn how to fold towels in various ways so they take up less space. http://www.homemadesimple.com/en-us/cleaning/pages/towel-folding-techniques.aspx

Many Cape Cod bathroom remodels are now using the open shelf concept for some storage.  It really adds to a spacious feel and allows you to add tons of Cape Cod charm to your bath.

Check out these links for some open shelving ideas:

http://www.houzz.com/ideabooks/491219/list/Bathroom-Trends--Open-Vanity-Storage

http://www.freshhomeideas.com/Room-Ideas/Bathrooms/Bathroom-Storage/open-bathroom-storage

Make Your Cape Cod Kitchen Island The Center Of Attention

Over the past few years an island has been one of the most requested features that people ask for in a kitchen. According to the National Association of Home Builders 80% of home buyers consider an island amust have. An island can fit into many kitchens, even small ones, coming in an endless array of styles and with features you may not have considered. Kitchen islands expand counter space, storage, and function. I’ve never once heard a cook say they had too much counter space.

Designing an Island

A kitchen is often the heart of a home so put a lot of thought into your island design before you build it and you won’t be sorry. Don’t be afraid to consult with a kitchen designer or a very experienced builder to help you fit one into your existing space and your lifestyle. They have a lot of experience helping you decide what will work and what won’t. Nothing is worse than an island that doesn’t function well. If it creates a bottleneck in traffic flow, doesn’t have the extras you need, or even worse, interferes with the kitchen work triangle, your island can cause more problems then it solves.

Proper clearance between the island, cabinets, and appliances is critical for your island to work well. Some of the standard clearances are: 42 inches between your island and surrounding objects to ensure traffic flow. Work station and dining table height should be 36” and 42” high for bar-style casual dining. These numbers are the ideal but rules are meant to be broken. I’ve seen islands with less then 42” between the island and kitchen counters and they have worked fine if well designed. Double check that you can open your appliances like a dishwasher or oven, and still have enough room to move around.

Kitchen Island Function

Many islands act as dining areas, but they can be so much more. Put in a wine refrigerator, ice maker, and warming drawer and you’ve got a terrific buffet/party area. Add a drawer style microwave, stove top, and an oven and you have a fully functional cooking area. A marble top, storage for baking pans, and a elevator shelf for your mixer and you’ve made the family baker happy. Add a butcher block countertop, a sink, and hide away trash and recycling and you have extra prep space. An island can be anything you want it to be!

Once you’ve made the decision on how you will use your island then the island configuration is easier. If your island contains your main sink then it will function better if it also has your dishwasher and pull out trash and recycling bins. If it’s a cooking area you will need ventilation and consider pull out drawers for your pot and pan storage. Think long and hard about how your island will function.

Kitchen Island Size

A recent trend in larger kitchen is two islands, one as a prep area with a sink, perhaps a marble baker’s countertop and a second island that acts as a dining area and a divider for open concept living spaces. However, bigger is not always better. An island shouldn’t be more then 4 feet wide otherwise the center becomes unreachable.

You can still put an island in a small kitchen. They don’t have to be solid, massive structures; think about a tall free standing kitchen table or a console table, long and narrow. To avoid it looking too substantial for a small kitchen think open shelving on the lower portion. That way it still adds counter and storage space, but it looks lighter visually. You can use wicker or wire baskets on the lower shelves to add interest and more usable space.

What if you really want an island but just don’t have enough space in your tiny kitchen? Think rolling cart. It can add valuable counter or serving space and can be rolled out of the way when not in use.

Kitchen Island Extras

The list of things that can be included in your island is endless. Many companies now make drawer-style appliances; refrigerators, dishwashers, warming drawers, microwaves, ice makers, and trash compactors. You can put in restaurant quality features as well; a grill, a fryer, wok area, steam trays, and more. Put book shelves at the end of your island for your cookbook collection, or hang your wine glasses from a rack. I’ve seen flat screen TV’s built into islands that act as a room divider between the kitchen and family living space. Always remeber: good lighting is imperative for your island and so are multiple electrical outlets.

Island Style

Your island doesn’t have to be rectangular so think out of the box. Islands now come in L- shape, curved, round, and everything in between. A straight side on the work/prep area is nice and curved on the seating side helps facilitate conversation for your friends.

There are so many choices for countertops. Granite is great for cooking areas. It’s easy to clean and you can put hot pots and platters directly on the stone. Marble is a favorite of bakers, it stays cool and dough doesn’t stick. Wood on the other hand is great for a dining area of an island, it’s warmer and more cozy looking and it’s softer on your elbows and china. Don’t feel you have to pick a single surface many larger islands have two different surface materials depending on their use.

Today even ready made cabinets come in various sizes, so don’t feel locked into the standard base of 24 inches. Of course, you can always have your builder make you a custom island. I’ve even seen a wine barrel used as an island base so again, be creative.

Another popular trend is the “unfitted” island, which looks more like an individual piece of furniture instead of a standard kitchen cabinet component. They have a distinctive look and furniture detail, often with a different surface then the adjacent kitchen counters. Unfitted islands many times are a different, but complementary color, than the rest of your kitchen.

So have fun with your kitchen island, keep the above considerations in mind when you are planning your island. The end result will be not only a great looking island but a very functional one as well.

Dual Kitchen Islands - A Fitting Design?

Double Kitchen Island in Cape Cod Home Remodeling Recently we were provided with an opportunity to design a new kitchen in a space that is double what we normally have to work with. Most kitchens here on Cape Cod are small, have too many doors and windows and provide numerous design challenges even in houses that are less then 10 years old.

In this upcoming kitchen remodel located in Centerville, we may move some walls as well as a door and two windows increasing our design flexibility. Going forward, I've been kicking around the idea of creating a kitchen with two large islands rather then the traditional galley or L-shaped kitchen. Having two islands, will meet the homeowners desire to have more reachable storage and avoid walls filled with banks of cabinets.

More to come...

Semi-Custom Cabinets Used to Build a Bed Surround?

The following is a blog post from our kitchen designer who has worked with us in designing a number of kitchen remodels. We thought the idea of using ready made semi-custom cabinets was a great and are planning to suggest it to several of our clients and even do it in our own home in the near future.

By Jayelynn Carlson 

I’ve designed small kitchens, large kitchens and every size in between in houses, cabins and even a boat. I’ve also designed bathrooms, offices and entertainment centers,  but until recently, I never thought to use semi-custom cabinetry to build a built-in bed surround.

Since this past May, I’ve been working with Joe Miller, a professional contractor and owner of Melina Home Solutions in southeast Florida. We’ve worked on a variety of his cabinetry projects together, like the ones I first mentioned above. He’s a great guy, and we’ve built a great rapport over the year. He’s an experienced installer who trusts what I do and who I, in turn, can trust to make the cabinetry look its best.

In August, Joe asked me to use Cliq Cabinetry — which is typically used for kitchen cabinets, I might add! — for his client’s built-in bed surround. Even though I never had a project quite like this, I was excited to get started and push my design skills.

Joe’s clients had limited storage in their home. Instead of buying standalone furniture, the goal of the bed surround was to add the much needed storage in an elegant, impressive way that didn’t add clutter. After discussing with Joe what he envisioned, I created a first draft of the cabinetry design.  He then presented it to his clients; we made some small revisions and it became a done deal. In September, we shipped the cabinets!

To get the high-end look Joe’s clients wanted, we used the traditional raised-panel Carlton door in the rich Cherry Russet finish. The details of the cabinets, combined with the crown molding stack at the top really make this a beautiful, handsome unit. Joe’s clients love the his and hers night-stands with deep drawers. The open shelving and upper cabinets provide the extra storage they were looking for.

Along with the bed surround, the project also included a bathroom vanity and closet. We used the Carlton cabinets in Cherry Russet again for continuity. The vanity is a simple basic unit with doors in the center and drawer storage on each side. For the closet, we inserted a pantry cabinet into a framed alcove and added molding, giving the bathroom a completely custom look.

I knew from the beginning that creating the bed surround was going to be a challenge. The hardest part was translating what I imagined into a design that worked within the parameters of the cabinets. While managing all the small pieces and components of the custom unit, I needed to make sure there was enough storage and that it still looked remarkable. With Joe’s expert installation, I think we pulled it off. The unit has a uniqueness that really shows what’s possible with a little creativity.

Jayelynn Carlson has worked in the design/remodeling industry for over 20 years and loves making her design projects spectacular. She has a keen understanding of what makes a kitchen a joy to be in, whether cooking, entertaining or just relaxing. In her spare time, Jayelynn is an avid hockey Mom, logging in many hours at the rink volunteering. She loves shopping, both in the mall and on the Internet, and is always looking for the best deal. The best part of her day is spent hanging out with her kids and new puppy.

Cape Cod Bathroom Design & Usability Idea- Shower Base Options

Showering Spaces..The MVP of the Bathroom. Most folks love a good long hot shower. It's also a great place to relax and do some productive thinking.

When it comes to building a new shower space, options are plentiful and be warned- Showers are usually the most expensive space within a bathroom. Many custom shower spaces run well over $6K and we done some in the double digit range.  This is because a considerable amount of work and materials go into constructing a durable and leak proof showering space.

Below I have detailed the various options that are available as well as the pro and con of each type of base.

Stock Shower Base This refers to a type of shower base that is readily available and installs quickly.

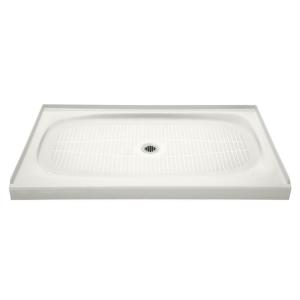
Cape Cod ShowerCast Iron. There is as of this post, only one company that makes cast iron shower bases. (Kohler) and they have only 5 sizes/styles to choose from. All single threshold.  However, I personally believe that a cast iron shower base is the way to go in shower bases. The durability and ease of cleaning of cast iron makes it a worthwhile investment.

Up: Built like a tank. Easy to clean. Will last more then a lifetime.

Down: Heavy and challenging to install. Very limited options in size and  curb placement.

It's on my wish list for Kohler to create a cast iron shower base measuring 48x36 0r 60x36 with a double curb.  This would allow for a corner shower with a glass wall which would be fabulous in many of the undersized bathrooms that we remodel.

Cast iron bases are usually used in tandem with tile walls.

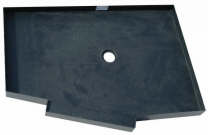
Composite Shower Pan in Cape CodComposite. Typically these are shower bases fabricated from acrylic or fiberglass.

Up: Available in many sizes, shapes and colors.  Most are durable and easy to clean. Installation is a breeze. Most cost effective way to create a custom shower.

Down: Can easily be damaged by a dropped tool, susceptible to scratches. Can feel spongy unless embedded in structural mortar.  (We typically set our bases in mortar.)

Composite bases can be used with tile or with color matched surrounds.

Custom Shower Base This refers to a type of shower base that built on site and fully customizable.

Metal Pan. Many custom shower bases are constructed using a metal pan fabricated from sheets of copper. This method allows for a base of just about any size. Typically the metal pan is made by folding up all sides of a sheet about 4-6 inches and then soldering any joints to create a water tight base.  The base sits directly on the sub floor and cement is poured inside the pan to create a sloped plane from all sides towards the drain. The tile is usually set over this cement base.

In addition to the pan, a curb must be made on the outer perimeter of the pan. Poured concrete or bricks usually make up the curb which is covered with tile and/or stone.

Up: Can be customized to fit any space. Built like a tank.  Some methods of construction will allow for a trench drain and larger tiles sloped in one direction.

Down: Labor and material intensive. Can be expensive.  Copper can corrode from chemicals in modern soaps and shampoos.

TBT Custom Tile Shower Base 1 50Composite Pan. We have used composite pans when we have needed a custom size or a double curb. Made to our specs with drain placement where needed, this is a proven and successful method of creating a tileable shower base. We order them from showerbase.com and they are shipped pre-sloped with the curb built right in. We can set it in place with a layer of thinset, set up the walls with cement board and water proofing and then start tiling.

Up: Customizable for any space. Saves labor, time and money.  Will last a lifetime. Stock sizes immediately available.

Down: Lead time is about 2-3 weeks for custom sizes.

Recommendations

For a durable easy to clean shower base, I would recommend cast iron if the sizing works.

If your need a standard size and a base that is easy to clean, a stock composite base will be just the ticket.

For a fully custom base covered with tile, a composite pan is the way to go.

Wow! We're Recognized As Best of Houzz for 2013!

Best of Houzz 2013 @designREMODEL@designREMODEL of Mashpee Receives  Houzz’s 2013 ‘Best Of Houzz’ Award

Annual Survey and Analysis of 11 Million Monthly Users

Reveals Top-Rated U.S. Professionals 

January 31, 2013 – @designREMODEL of Mashpee MA has been awarded  “Best Of Houzz” 2013 by Houzz, the leading online platform for residential remodeling and design.  The Cape Cod based bath and kitchen remodeling firm was chosen by the more than 11 million monthly users that comprise the Houzz community.

The Houzz “Best Of Houzz” award for 2013 is given in two categories: Customer Satisfaction and Design.Customer Satisfaction award winners are based on homeowner members who rated their experience working with remodeling professionals in 12 categories ranging from architects, and interior designers to contractorsand other residential remodeling professionalsDesign award winners’ work was the most popular among the community of 11 million monthly users, also known as “Houzzers,” who saved more than 124 million professional images of home interiors and exteriors to their personal ideabooks via the Houzz site,iPad/iPhone app and Android app.

"@designREMODEL is honored to be in the top 3% of Remodeling professionals  chosen on Houzz for their commitment to provide an exceptional remodeling experience.

“Houzz provides homeowners with an in-depth, 360-degree view of building, remodeling and design professionals through images of their work, reviews and an opportunity to interact with them directly in the Houzz community,” said Liza Hausman, vice president of community. “We’re delighted to recognize@designREMODEL among our “Best Of” professionals for exceptional customer service as judged by our community of homeowners and design enthusiasts who are actively remodeling and decorating their homes.

With Houzz, homeowners can identify not only the top-rated professionals like @designREMODEL but also those whose work matches their own aspirations for their home. Homeowners can also evaluate professionals by contacting them directly on the Houzz platform, asking questions about their work and evaluating their responses to questions from others in the Houzz community.

About @designREMODEL

Located on beautiful Cape Cod, @designREMODEL specializes  in  baths, kitchens and whole house remodels while providing our clients with an exceptional experience by Doing Remodeling Right.

About Houzz

Houzz (www.houzz.com) is a leading online platform for home remodeling, providing inspiration, information, ‘advice and support for homeowners and home improvement professionals through its website and mobile applications. Houzz features the largest residential design database in the world, articles written by design experts, product recommendations, a vibrant community powered by social tools, and information on more than 1.5 million remodeling and design professionals worldwide who can help turn ideas into reality. @houzz_inc

Whole House Makeovers - Transforming Houses Into Homes

Whole House Makeovers in Cape Cod MAWith the real estate market here on Cape Cod improving for the 13th straight month, home sales have taken quite a jump. As a result, we're seeing more requests for whole house makeovers where we remodel, update and fix just about every part of a home prior to the homeowners moving in. A whole house makeover involves restoring part or all of house to a like new condition. Often times much of the work will involve making changes requested by the new homeowners wanting make the house a home with changes that reflect their personal style.

As I write this post, we have a condo makeover underway in Maushop village which is located in New Seabury MA. This makeover has us doing the following:

1. Remodel main bathroom which includes removing the outdated tub and installing a cast iron shower base with tile surround. Replacing all of the drywall on the walls and ceiling. Installing all new fixtures and fittings as well as new floor tile.

2. Removal of wall paper throughout and repainting the walls, ceiling and woodwork. A fairly involved process as the wall paper was installed over walls that were not properly finished smooth and are in rough shape.

3. Complete remodel of kitchen which includes adding more cabinets, granite counters and a tile backsplash with cool glass accents. Convert electric stove to gas.

4. Update 1/2 bath with new fixtures, fittings and new flooring.

5. Correct and update electrical wiring. Add outside water spigots. Insulate exposed heat pipes. Build and install rain baffles over vents in attic. Add and update lighting throughout. Install new venting and ceiling fans.

6. Refinish floors and stairs.

Once completed, the entire inside of this Maushop condo will be all new and ready for the homeowners to use as their home away from home on Cape Cod!

Another example of a whole house makeover that we are scheduled to start this winter, is located in nearby Waquoit, a village within the town of Falmouth.  This project is much like the Condo makeover above except on a much larger scale.

The following is planned for this project.

1. Installing wide pine floors in the rooms that currently have carpeting.

2. Replacing windows and doors that are due for replacement.

3. Fabricating and installing built-in shelving throughout the house for the homeowners large collection of books.

4. Replacing all of the interior doors, jambs and casings. Replacing woodwork that was poorly installed.

5. Complete remodel and expansion of the kitchen.

6. Full remodel of the master bath.

7. Correcting issues in a recently remodeled (by others) guest bath

8. Painting all walls and ceilings, finish stained woodwork throughout home.

9. Build out home office.

10. Correct multiple issues that were found by home inspection company prior to the sale of the house.

11. Complete interior sanding and finishing of all wood floors.

12. Change out exterior decking and railings.

These kind of makeovers are intensively involved and costs range anywhere from $60,000 to $250,000 Many of these projects are about creating "Forever Homes" that the homeowners are planning to enjoy for the balance of their lives.

Whole house makeovers are one of our favorite projects as we can really transform a house into a home!

Better Bathroom Storage

Orginally posted on FineHomeBuilding.comby Jamie Goldberg

The house I grew up in had only one full bathroom, which my parents, sister, brother, and I shared. Somehow, we made it work, as do millions of families today. But almost any bathroom will work better if a little more storage is added to the mix. The best time to maximize a bathroom’s storage capacity is, of course, at the design stage, but you can explore plenty of storage-boosting options while remodeling or simply when updating fixtures and cabinetry.

Whether incorporated into the original design or added after the fact, bathroom-storage expansion its into three categories: (1) increasing the capacity of traditional storage areas like vanity cabinets; (2) maximizing existing floor and wall space with new storage options; and (3) identifying storage possibilities in spaces that are not traditionally used for storage. These approaches are outlined on the next page, and strategies from all three are used in the illustrated examples.

The Full-Function Vanity

Full Function Vanity in Cape Cod RemodelingIt’s not uncommon even for large vanity units to fall short on functional storage. In this example, the space between the sinks is wider than 30 in., allowing a stacked 24-in.-wide butt-door cabinet pair. The double doors and lack of a center stile allow access from both sides. The lower unit is backless and contains a wall outlet, making it useful for housing and charging electric shavers and electric toothbrushes. The 12-in.-deep space above houses daily-use items that are too large for the medicine cabinets.

False panels in the sink bases have been converted to tilt-out trays for toothpaste and dental-floss storage. Doors are equipped with storage racks, including one for hair dryers. If extra storage is needed, U-shaped shelves can double the capacity of the sink cabinets. The center drawer’s functionality is increased with a tiered divider, while the basic linen tower has been made more useful with a quartet of roll-out trays in the lower section.

The Compact Bath

Compact Bath in Cape Cod RemodelingThis typical, small master bath offers occupants two sinks and a shared drawer bank but not much more in the way of storage. National Kitchen & Bath Association design guidelines recommend 30 in. of clearance (or a minimum of 21 in.) in front of the vanity and toilet, eliminating the opportunity for floor storage on the opposite wall. However, a 12-in.-deep shelf runs the length of the wall above the entry door to hold occasional-use items. The shelf can be supported by L-brackets or decorative supports, as long as they don’t interfere with the door swing below. Taking advantage of otherwise unusable space behind the in-swing door is a tall, shallow cabinet installed between the wall studs. It holds occasional-use items that might otherwise be stored in a recessed medicine cabinet, freeing that valuable point-of-use space for daily needs. An 8-in.-deep cabinet above and within reach of the toilet offers point-of-use storage for spare rolls of tissue and other items.

The Maximized Master Bath

Master Bathroom Remodeling in Cape Cod MAThis remodeled bath maximizes daily point-of-use space in all three functional areas: tub, vanity, and toilet. The water closet features a floor cabinet for backup toilet paper, a toilet brush, and toilet-cleaning supplies. The wall cabinets above the toilet, only 8 in. deep to avoid collisions, hold supplies within reach of the user. Occasional-use items for the water closet can be stored in the upper section. The shower includes double niches to hold each occupant’s bathing necessities. One is within 15 in. of the shower bench for easy reach. The tub deck is extended with storage in front for towels and other bath essentials. The deeper deck also facilitates a safer sit-and-swivel entry. In the vanity area, the linen tower offers space for a roll-out hamper in the bottom section. The opposite vanity takes advantage of an extrawide countertop to offer additional storage above for small electric devices with access to an outlet. Each wall cabinet is only 12 in. deep to allow counter space in front. Three ways to boost bathroom storage

1. Increase the capacityof traditional areas • Add two-tiered organizers to any 4-in. or taller vanity drawer boxes, thus creating extra half-drawers without altering the existing cabinet. • Install a storage rack on the back of every vanity base-cabinet door. Special racks are available for space-hogging hair dryers. • Add roll-out trays to the bottom of base cabinets, and use them in place of shelves in linen towers, making what’s stored in the back more visible and accessible. • Wrap a U-shaped shelf around undersink plumbing to add an extra level of storage. • Convert the false panel below a vanity countertop to a tilt-out tray.

2. Maximize existing floor, surface, and wall space • Maximize point-of-use vanity storage with countertop cabinetry. Use 12-in.-deep cabinets, keeping them at least 3 in. from the sink edge to prevent water damage. The cabinets can extend to the ceiling with a decorative crown molding, or stop a foot lower if there’s a vent or light above. Regardless of height, they should be finished with a topcoat that protects against moisture, and be kept as dry as possible to prevent moisture damage at the point of contact with the vanity top. • Increase point-of-use commode storage. If it is not situated under a window, install a single or stacked cabinet to the ceiling above the toilet. It should be low enough for a seated user to reach inside and extend no farther out than the toilet tank to avoid causing injury. • If there is a window directly above the toilet, space might still exist for a shorter cabinet or shelf to be installed between the window and the ceiling for backup supplies. Ensure that the bottom is finished because it will be highly visible. • Take advantage of unused floor space to create a built-in furniture armoire, floor cabinet, or storage bench for backup and occasional-use items. Remember to allow for clearances when adding storage of this type. National Kitchen & Bath Association design guidelines recommend 30 in. in front of a vanity, commode, or shower. NKBA guidelines are often more stringent than building codes, but be sure to check local requirements to ensure that you’re in compliance whenever undertaking a bathroom project.

3. Identify storage possibilities in nontraditional spaces • Add a finished shelf above the bathroom entry door to take advantage of otherwise unused space for occasional-use items. Whenever possible, run it wall to wall. • Take advantage of the forgotten space behind an in-swing door by building a tall, shallow cabinet into the wall between studs. • Create a shower-wall niche for each bathroom occupant to accommodate daily point-of-use bathing items. At least one should be built within 15 in. of the shower bench for seated access. • Plan open-storage cubbies for towels or bath supplies on the front end or exposed side of a new tub deck. • Plan built-in, open wall-shelving units at one or both ends of a tub-only enclosure for daily point-of-use bathing items in storage baskets.

Drawings: Martha Garstang Hill

From Fine Homebuilding217 , pp. 88-92 January 20, 2011 © 2012 The Taunton Press, Inc. More good stuff from Fine Homebuilding here.

@home On Cape Cod Newsletter. November 2012

@designREMODEL Newsletter My heartfelt THANKS! to you for helping us have another great year! And this thanks goes out to all of our clients, trade partners, suppliers and friends because each and everyone of you have contributed to our success in big and small ways.

Happy Thanksgiving!

Willy Wonka. A Family Affair...

Willy-Wonka-Poster-Art-201x300Do It At Cotuit! has become the catch-phrase for this powerhouse of live theater and a wide variety of arts and media. Located right on Route 28 in Cotuit, they have an ever changing art gallery, multiple venues for live shows, and educational classes & workshops are also on going. So there is always something happening. And speaking of shows, this year's holiday production features the zany fun of Willy Wonka with a good number of families participating as cast and crew.

This year, my daughter KatieBeth performs in "Willy Wonka" as an Oompah Loompah. This is her second holiday production at Cotuit. Her first was performing as Zuzu in It's A Wonderful Life. In addition, my better half Tara, takes yet another turn as the production coordinator for the entire show. A position she has volunteered for many times.

I will serve a supporting role as one of the stage hands working back stage. For our family, Willy Wonka will provide much fun together at the holidays!

If you want to enjoy Willy Wonka, don't delay ordering tickets. As many shows are of big city caliber and tickets sell out fast! There will be 12 shows spanning Dec 7-23rd. Tickets can ordered online at the web link below.

If You Go:

Cotuit Center for the Arts 4404 Falmouth Road (Route 28) Cotuit. 508.428.0669

ArtsOnTheCape.org

Getting Ready For Winter

With Winter around the corner, here are some reminders to prepare you for the cold, snowy months ahead.

1. Locate and place in an accessible location.

Ice Scrapers Snow Shovels Ice Melt Jumper Cables

2. Shut off any exterior water supplies and disconnect any hoses hooked up to frost free spigots.

3. If you have a fire hydrant near your property, mark its location with a tall stake and be sure to clear it out after any snow storms for access in case of a fire.

4. Clean out your gutters...again! Ice build up over clogged gutters can lead to leaks.

5. Protect any prized shrubs exposed to winter winds with a stake and burlap surround.

Our Next Issue

In our next issue of @home, I will share Cape Cod Winter Living... How To Survive!

@home Tip

Nest Thermostat in Cape Cod RemodelingAre You Ready For a Nest?

Recently, I left a job-site early on a chilly fall afternoon. I picked up my iPhone and with a few taps, turned up the heat so the house was toasty warm upon arriving home. Then later that night, I felt a bit too warm so I turned the heat down using the my iPhone that was on my night stand.

For some this might seem like old hat. But for others, this is something right out of Star Trek. From one of the designers of the iPod, we can now have much improved control over how we heat or cool our homes thanks to a well-designed piece of technology called NEST.

NEST is a digital, self-learning thermostat that can be controlled by any device that has online access such as a smartphone, computer or tablet. The beauty lies not only in its good looks, but also in its ease of use and simplicity.

Once installed, you use it as you normally would any thermostat adjusting it to suit your comfort. After about ten days, the NEST will start setting itself based upon your usage pattens. It will also go in to an away mode if it senses that no has occupied the space for a certain length of time.

In a nutshell, NEST is a worthy technology for your home because:

1. NEST looks fabulous on any wall. No clunkiness here.

2. No complicated use or programming instructions.

3. Turn it up, turn it down. Done.

4. Nice big numbers that are easy to read.

5. Cool Tech to show off to your friends!

For more details on NEST, read the Slate.com review.

Go to the NEST website.

For clients of @designREMODEL, I'll be happy to help you decide if NEST is right for your home. Just give me a call or shoot me an email.